

- Introduction
- Transporting binaries
- Preparing lin01
- Transfer lin01 from preparation area to darksite
- Deploy the VCF Installer
- Deploying VCF Management Domain
Introduction
In this series i’ll walk through how to go about deploying, and managing a completely disconnected environment.
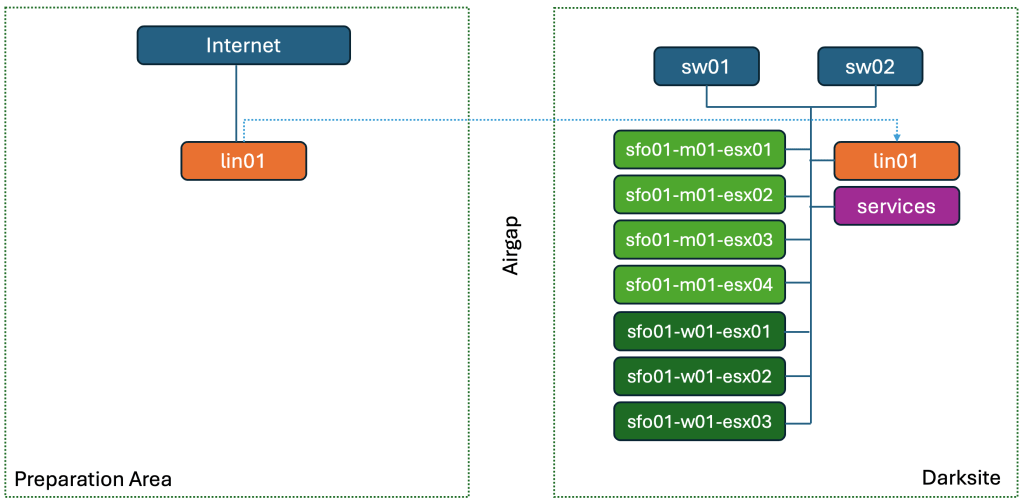
Below is a diagram of what the environment looks like, it’s a standard architecture design with a management domain, and a workload domain. If you don’t require a dedicated workload domain you can still follow this series, just slightly modify where stuff gets deployed.
Except for the servers required for the management domain, and workload domain, i also have a linux machine that will host the VCF Depot, A harbor registery and a few other helper services. The purple Services may differ, but required are DNS and NTP. Optionally you might want AD/LDAP, PKI etc.
Transporting binaries
There’s likely the same amount of ways you could do this, as deployments, thus i’m going to show the way that i recommend doing this for it’s simplicity, and in the end it will have similar results however you do this.
I’m going to create a VM called lin01 in what i call the “Preparation Area”. I will fill this VM with all the things required for day0 to day2 operations, export it from the preparation area, and then import it into the the Darksite. Most customers i’ve spoken to seem okey with transporting things into the environment, it’s the other way of transporting things out of the environment where it gets sensitive. If you have another opinion on this, please do reach out to me to discuss. In the end you will need a Linux VM, with a webserver installed, a lot of files downloaded by VCF Download Tool (VCFDT), plus some container registeries etc depending on what you are going to do delpoy in the future.
Preparing lin01
Configure webserver
I’m going to use my favourite linux distro Ubuntu for this.
Install a standard Ubuntu 26.04 LTS, provide it with networking info to be able to reach the internet.
Ensure that you have a very large disk (1TB), or that you add a second disk and mount it to /var/www/ below.
This is a simplified installation, if you wish to do this using Photon instead of Ubuntu, or want to use a PKI with signed certificates, or would like a more step by step tutorial please see my previous post VCF9 Offline Depot
# install dependenciessudo apt install apache2 -y# enable SSL for Apachesudo a2enmod sslsudo systemctl restart apache2# generate a self-signed certificatesudo openssl req -x509 -nodes -days 3650 -newkey rsa:2048 -keyout /etc/ssl/private/apache-selfsigned.key -out /etc/ssl/certs/apache-selfsigned.crt# --- example ---# Country Name (2 letter code) [AU]:SE# State or Province Name (full name) [Some-State]:Stockholm# Locality Name (eg, city) []:Stockholm# Organization Name (eg, company) [Internet Widgits Pty Ltd]:VMware By Broadcom# Organizational Unit Name (eg, section) []:Engineering# Common Name (e.g. server FQDN or YOUR name) []:lin01.rainpole.io# Email Address []:administrator@rainpole.io# --- example ---# create a http password for your depot, i'll be using username: vmware, password: depotsudo htpasswd -c /etc/apache2/.htpasswd vmware# create vhost configuration filesudo cat << 'EOF' > /etc/apache2/sites-available/lin01.rainpole.io.conf<IfModule mod_ssl.c><VirtualHost *:443> ServerAdmin administrator@rainpole.io ServerName lin01.rainpole.io DocumentRoot /var/www SSLEngine on SSLCertificateFile /etc/ssl/certs/apache-selfsigned.crt SSLCertificateKeyFile /etc/ssl/private/apache-selfsigned.key ErrorLog ${APACHE_LOG_DIR}/error.log CustomLog ${APACHE_LOG_DIR}/access.log combined<Directory "/var/www"> AuthType Basic AuthName "Restricted Content" AuthUserFile /etc/apache2/.htpasswd Require valid-user</Directory><Directory "/var/www/umds-patch-store"> Require all granted</Directory> vo/vmw/Compatibility/VxrailCompatibilityData.json</VirtualHost></IfModule>EOF# enable the sitesudo a2ensitesudo systemctl reload apache2# change owner of /var/www and grant usersudo usermod -a -G www-data vmwaresudo chgrp -R www-data /var/www/sudo chmod 777 -R /var/www/
Download Binaries using VCF Download Tool
The next step is to start sourcing the files that will be required. In an Online deployment this is quite easy, you just enter an activation code and it will start downloading everything from dl.broadcom.com.
Go to support.broadcom.com, select My Downloads, filter by VMware Cloud Foundation, VMware Cloud Foundation 9, 9.1.0.0, VCF Installer, now select Drivers and Tools to find the binary.
Transfer the binary to the linux vm and run the following.
# create directory for VCF Download Tool (VCFDT)mkdir -p /home/vmware/vcf-download-tool# extract files to directorytar -zxvf vcf-download-tool-9.1.0.0.25371089.tar.gz -C /home/vmware/vcf-download-tool/
Now we need to generate a software depot id, register that with the VCF Business portal, to then dowload the bits.
(in version 9.1.0.0.25371089 there is a typo in the output, if you copy/paste the first link it says broadcom.net, change this to broadcom.com)
./vcf-download-tool/bin/vcf-download-tool configuration generate --software-depot-id# --- example output ---# *********Welcome to VCF Download Tool***********## Version: 9.1.0.0.25371089# Use this link to register https://vcf.broadcom.com/vcf/clm/download-manager/register?serviceId=xxxxx-xxxxx-xxxxx-xxxxx-xxxxx. # Alternatively login at https://vcf.broadcom.com, select Software depot Registration and use this Software depot ID: xxxxx-xxxxx-xxxxx-xxxxx-xxxxx## Log file: /home/vmware/vcf-download-tool/log/vdt.log
Open the “use this link to register” and authenticate with your user.

Select a Software Depot Name (it’s a human readable string) and select Register.
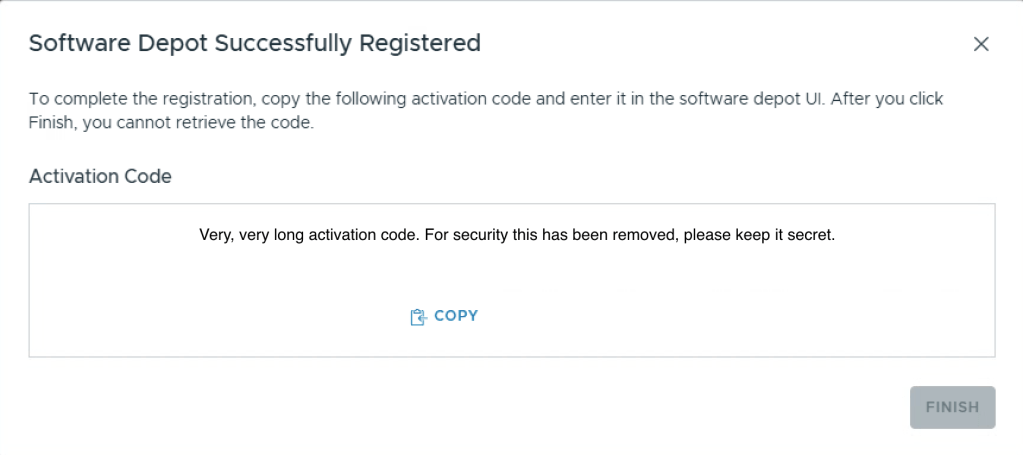
Copy the activation code, we’re going to place this in a file on the lin01 machine.
nano /home/vmware/activation-code# paste in the activation code, and the activation code only# save using ctrl+x -> yes.
Now we’re going to start downloading binaries using VCFDT.
Official Documentation VCFDT Command line options,
/home/vmware/vcf-download-tool/bin/vcf-download-tool binaries download --sku vcf --vcf-version=9.1 --depot-store=/var/www/ --depot-download-activation-code-file=/home/vmware/activation-code
This will take quite a while since it’s now downloading everything that is VCF 9.1.0.0. If you want you can limit this to only download Install, Upgrade, certain packages etc using flags.
du -sh /var/www/PROD/# example output# 257G /var/www/PROD/
Now let’s get the last bits which is the esx/umds binaries. First let’s list what will be downloaded and modify it to our needs.
/home/vmware/vcf-download-tool/bin/vcf-download-tool esx configuration -G*********Welcome to VCF Download Tool***********Version: 9.1.0.0.25371089--------------------------------------------------------------------------------------------------URL Type | Removable | URL--------------------------------------------------------------------------------------------------HOST | NO | https://dl.broadcom.com/PROD/COMP/ESX_HOST/iovp-main/vmw-depot-index.xmlHOST | NO | https://dl.broadcom.com/PROD/COMP/ESX_HOST/addon-main/vmw-depot-index.xmlHOST | NO | https://dl.broadcom.com/PROD/COMP/ESX_HOST/main/vmw-depot-index.xmlHOST | NO | https://dl.broadcom.com/PROD/COMP/ESX_HOST/vmtools-main/vmw-depot-index.xml--------------------------------------------------------------------------------------------------4 elements--------------------------------------------------------------------------------------------------Host Versions for which patch content will be downloaded:embeddedEsx-6.7-INTLesxio-9.1-INTLarmEsx-9.1-INTLembeddedEsx-8.0-INTLembeddedEsx-9.1-INTLembeddedEsx-7.0-INTLembeddedEsx-9.0-INTLesxio-8.0-INTLesxio-9.0-INTLLog file: /home/vmware/vcf-download-tool/log/vdt.log
I won’t be using either vSphere 7, 8 or 9 binaries, nor Arm or DPU so i’ll remove them.
/home/vmware/vcf-download-tool/bin/vcf-download-tool esx configuration -D esxio-8.0-INTL -D esxio-9.0-INTL -D esxio-9.1-INTL -D armEsx-9.1-INTL -D embeddedEsx-6.7-INTL -D embeddedEsx-7.0-INTL -D embeddedEsx-8.0-INTL -D embeddedEsx-9.0-INT
Let’s check again
/home/vmware/vcf-download-tool/bin/vcf-download-tool esx configuration -G*********Welcome to VCF Download Tool***********Version: 9.1.0.0.25371089--------------------------------------------------------------------------------------------------URL Type | Removable | URL--------------------------------------------------------------------------------------------------HOST | NO | https://dl.broadcom.com/PROD/COMP/ESX_HOST/iovp-main/vmw-depot-index.xmlHOST | NO | https://dl.broadcom.com/PROD/COMP/ESX_HOST/addon-main/vmw-depot-index.xmlHOST | NO | https://dl.broadcom.com/PROD/COMP/ESX_HOST/main/vmw-depot-index.xmlHOST | NO | https://dl.broadcom.com/PROD/COMP/ESX_HOST/vmtools-main/vmw-depot-index.xml--------------------------------------------------------------------------------------------------4 elements--------------------------------------------------------------------------------------------------Host Versions for which patch content will be downloaded:embeddedEsx-9.1-INTLLog file: /home/vmware/vcf-download-tool/log/vdt.log
Much better, now lets download them.
/home/vmware/vcf-download-tool/bin/vcf-download-tool esx download --depot-store=/var/www/ --depot-download-activation-code-file=/home/vmware/activation-code*********Welcome to VCF Download Tool***********Version: 9.1.0.0.25371089Downloading vLCM compatibility data.Successfully downloaded compatibility data.Depots to be downloaded:--------------------------------------------------------------------------------------------------URL Type | Removable | URL--------------------------------------------------------------------------------------------------HOST | NO | https://dl.broadcom.com/PROD/COMP/ESX_HOST/iovp-main/vmw-depot-index.xmlHOST | NO | https://dl.broadcom.com/PROD/COMP/ESX_HOST/addon-main/vmw-depot-index.xmlHOST | NO | https://dl.broadcom.com/PROD/COMP/ESX_HOST/main/vmw-depot-index.xmlHOST | NO | https://dl.broadcom.com/PROD/COMP/ESX_HOST/vmtools-main/vmw-depot-index.xml--------------------------------------------------------------------------------------------------4 elements--------------------------------------------------------------------------------------------------Depots download started.356 VIBs added out of 356 expected VIBs.Depots downloaded successfully.Log file: /home/vmware/vcf-download-tool/log/vdt.log
Transfer lin01 from preparation area to darksite
It’s now time to move lin01 from your preparation area with internet connectivity to your darksite.
Use your preferred method, usb-drive, diode, smoke signals, whatever gets the job done.
Deploy the VCF Installer
There’s two choices here.
- In a minimal environment you can deploy the VCF Installer directly to a hypervisor in your management domain. The VCF Installer will during the installation process switch roles from the installer, to the sddc-manager.
- The other choice is if you have a laptop running VMware workstation, or another ESXi host that you can use for the time being to run the installation of. The benefit with doing this is that you can keep the VCF Installer for further deployments, or to add additional instsances or components.
In my deployment, i’ve chosen to deploy the VCF Installer in a permanent location on a temporary hypervisor.
When the installer is deployed and started, use a browser and navigate to the https:// address of your installer.
Login using admin@local and the password you configured.
We now need to configure the installer to retrieve the binaries from your lin01 vm.
First step is we need to make sure the installer trusts the self-signed certificate created on lin01.
William has created an excellent blog on this, where most of these commands come from.
From lin01 terminal, send the self-signed certificate file to the VCF installer Appliance.
scp /etc/ssl/certs/apache-selfsigned.crt vcf@sfo-ins01.sfo.rainpole.io:/home/vcf
SSH into the VCF Installer using the root account, the vcf account does not have priviliges, nor sudo rights to add a certificate to the certificate chain. When prompted for the password to add the certificate, it’s changeit
root@sfo-ins01 [ ~ ]# keytool -import -trustcacerts -file /home/vcf/apache-selfsigned.crt -keystore /usr/lib/jvm/openjdk-java21-headless.x86_64/lib/security/cacerts -alias lin01.rainpole.ioWarning: use -cacerts option to access cacerts keystoreEnter keystore password:Owner: EMAILADDRESS=administrator@rainpole.io, CN=lin01.rainpole.io, OU=Engineering, O=VMware By Broadcom, L=Stockholm, ST=Stockholm, C=SEIssuer: EMAILADDRESS=administrator@rainpole.io, CN=lin01.rainpole.io, OU=Engineering, O=VMware By Broadcom, L=Stockholm, ST=Stockholm, C=SESerial number: 713dcd19e47d9c55aa059ec235d6fe426307fae8Valid from: Tue Jun 23 13:52:51 UTC 2026 until: Fri Jun 20 13:52:51 UTC 2036Certificate fingerprints: SHA1: 6B:54:E5:2C:8A:85:A8:09:FC:32:5C:9B:79:D4:D2:48:29:54:3A:A3 SHA256: 1F:CB:1E:25:29:58:0C:2B:2F:FB:30:73:52:2D:D9:80:51:0F:99:FA:37:81:BE:80:A6:A5:01:C6:37:68:C3:24Signature algorithm name: SHA256withRSASubject Public Key Algorithm: 2048-bit RSA keyVersion: 3Extensions:#1: ObjectId: 2.5.29.35 Criticality=falseAuthorityKeyIdentifier [KeyIdentifier [0000: DF B8 F3 1F BD A1 52 AF 23 71 F2 BA EA B8 30 E3 ......R.#q....0.0010: 1C 1F 84 56 ...V]]#2: ObjectId: 2.5.29.19 Criticality=trueBasicConstraints:[ CA:true PathLen: no limit]#3: ObjectId: 2.5.29.14 Criticality=falseSubjectKeyIdentifier [KeyIdentifier [0000: DF B8 F3 1F BD A1 52 AF 23 71 F2 BA EA B8 30 E3 ......R.#q....0.0010: 1C 1F 84 56 ...V]]Trust this certificate? [no]: yesCertificate was added to keystore
Now we need to restart the VCF installer service so that it re-reads the trust store.
echo 'y' | /opt/vmware/vcf/operationsmanager/scripts/cli/sddcmanager_restart_services.sh
Now, in the VCF installer UI, select Depot Settings and Binary Management.
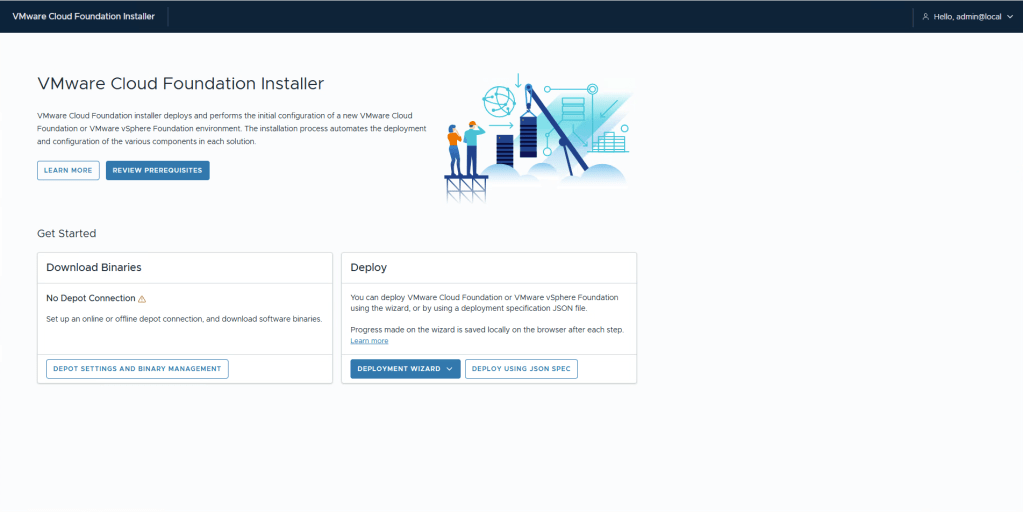
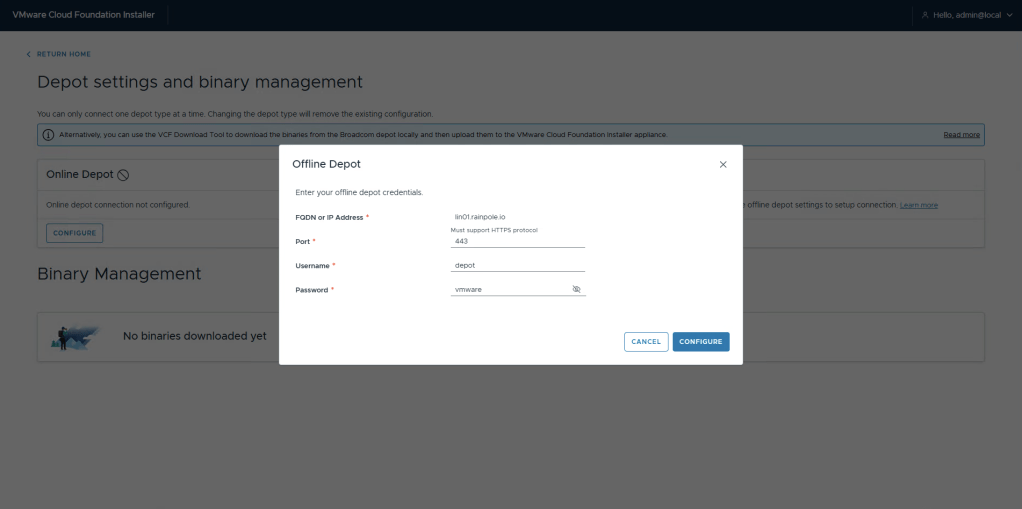
Select Configure under Offline Depot. In the popup, enter the URL for your lin01 vm, along with the username and password you created earlier, in my case vmware:depot.
click Configure.
You should now have a green checkmark next to Offline Depot, and the Binary Management section is populated.

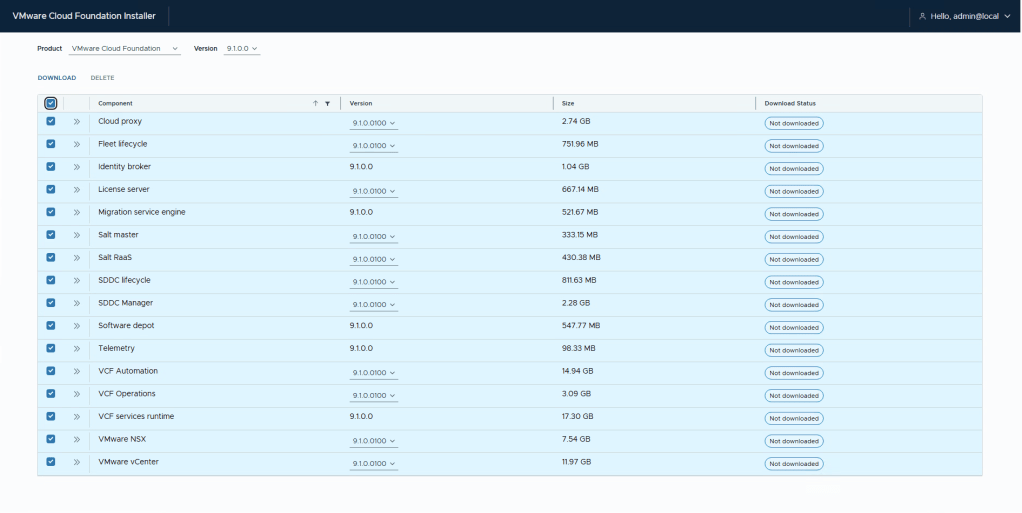
VMware Cloud Foundation, and version 9.1.0.0 is already selected by default. Select the checkbox next to Component to select all, and then select Download.
Deploying VCF Management Domain
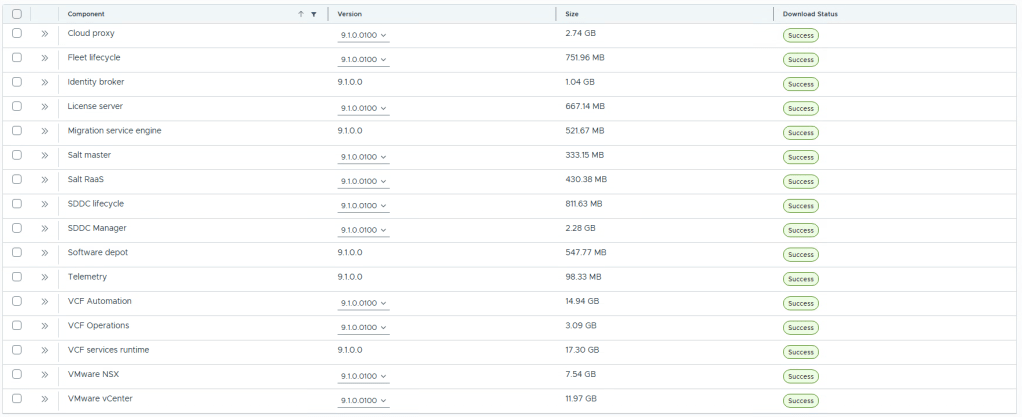
Shortly, you should expect to see this, we can now proceed to the deployment of VCF. Scroll all the way up and select Return Home. You can now choose to deploy VCF either using the UI Wizard, or by uploading a .json file. Both of these are out of scope for this blog series and are thoroughly covered by both the manual and other blogs. The deployment now that the binaries are sourced is 100% the same as if you where to have an unfiltered internet connection.
This concludes the first part of this blog series, the inital deployment of VCF is now done and we’ll move onto deploying additional services, supervisor, supervisor services etc.

 Every day is a learning day
Looking forward to reading the rest of the series. Very well explained, step by step.
LikeLike