VMware has released an Operator for the VMware Supervisor that will allow you to fill the “CD” gap of a CI/CD.
I wont go too much into detail what a CI/CD is (Continious Integration / Continious Deployment), other than that this allows you to create a declarative state of both your infrastructure (VMs, Kubernetes, Networks, Load balancers, Disks etc), place this in a Git repository and allow ArgoCD to monitor this repository for changes, and act upon them.
This allows you to either have ArgoCD just provision the actual infrastructure, but you can also build an “app of apps” where the infrastructure is first created, and then your application deployed onto the infrastructure. Very powerfull 🙂 But how is it setup?
Today, which is why this post is called 9.0.2, this can be done in multiple ways, and some require the manual creation of a service account to function correctly.
I’ll start with installation, and then this blog post will continue with multiple ways to instantiate ArgoCD.
It’s importat to note that after installing the ArgoCD Operator as a Supervisor Service. When a user requests ArgoCD into a vSphere Namespace, this is a private instance for that vSphere Namespace, and it’s actually run as a vSphere Pod.
What is a vSphere Pod? Well instead of spinning up a larger k8s cluster to run the very small application, we just spin up the ArgoCD container in a minimalistic runtime directly on the ESX Hypervisor. The result is fast, slim, and secure!
Installing Operator
Login to support.broadcom.com, ensure that you’re on the VMware Cloud Foundation portion by selecting the dropdown next to your Name, and select VMware Cloud Foundation.
Now click My Downloads, and search for Supervisor. You should get one hit saying VMware Supervisor Services.
Scroll down to ArgoCD Service, Download the latest (As of writing 1.1.0) and download the Service Yaml, and the ArgoCD CLI binary for your operating system (You will need it later).
Open the vSphere Client to the vCenter where you are running the Supervisor.
Navigate to Supervisor Management by clicking the 3 horizontal lines, then select Services.
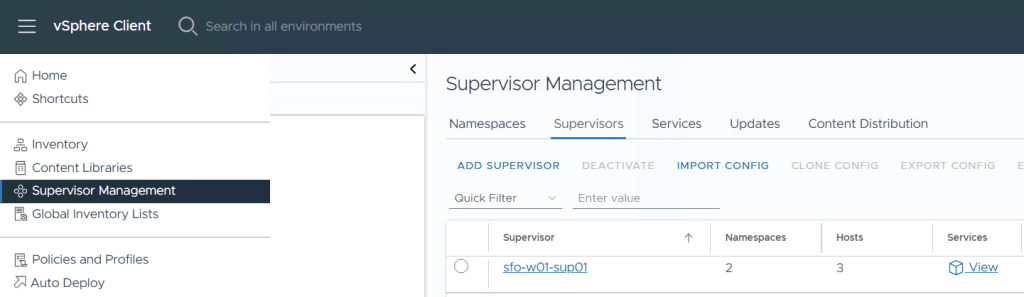
In the dropdown next to Supervisor Services, ensure you have the right vCenter selected. Then click Add New Service.

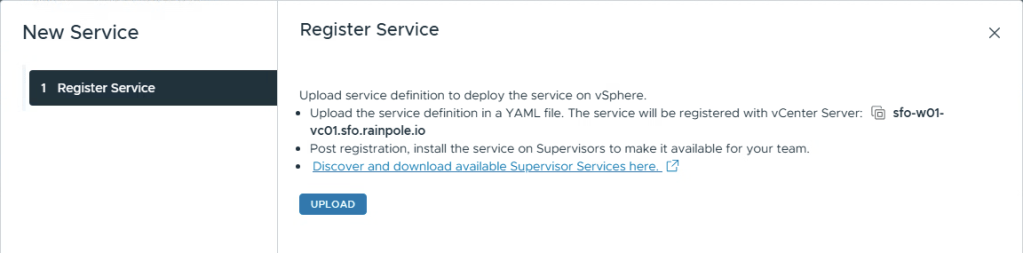
Select Upload, and provide the .yaml services file you just downloaded.
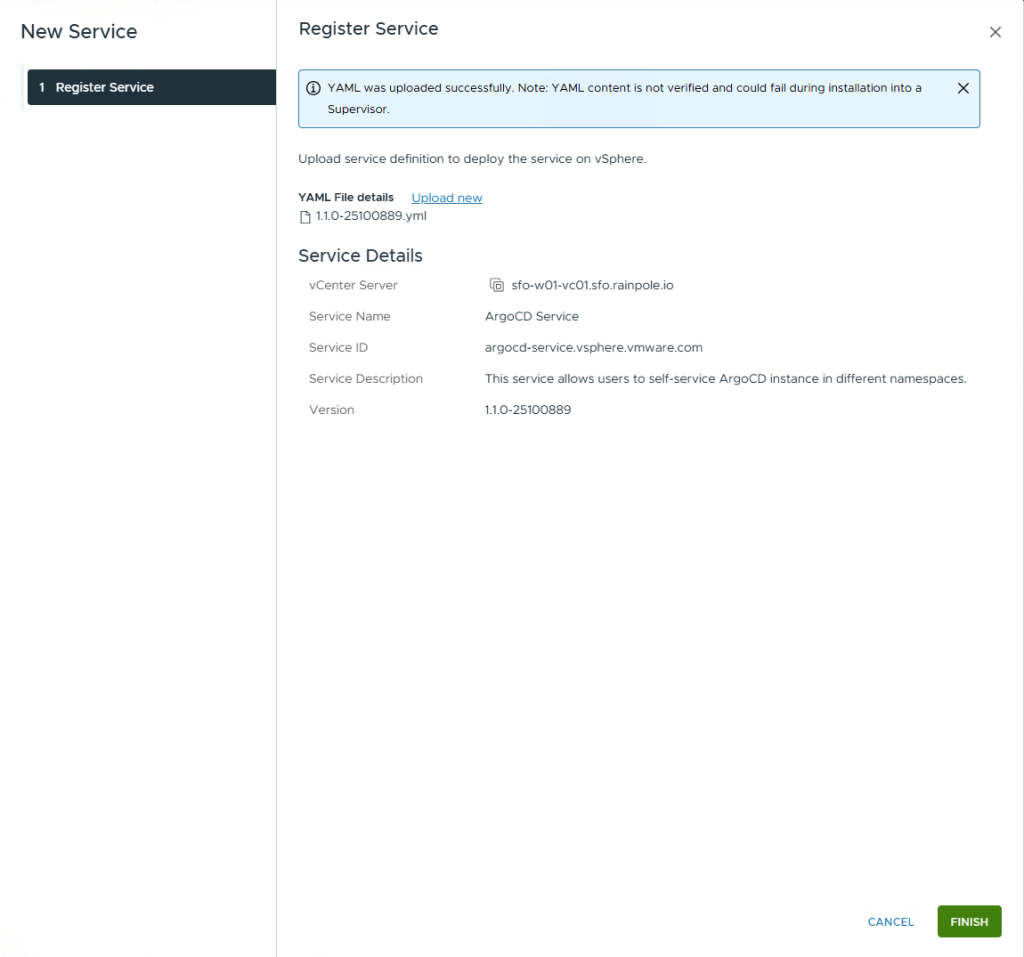
Click Finish
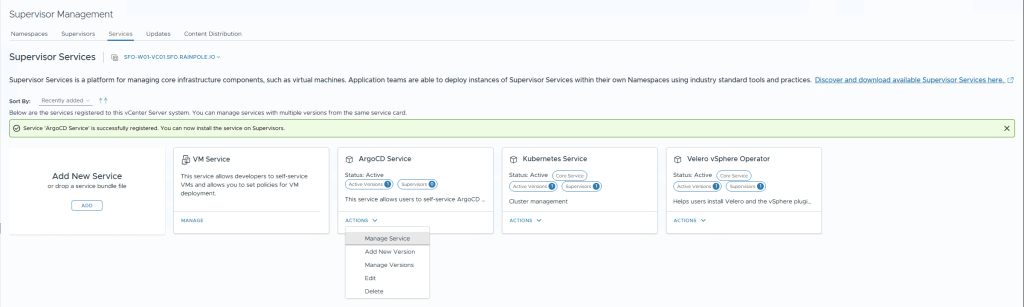
The service is now registered, but it needs to be enabled on the supervisor, select Actions, on the ArgoCD Service, and then Manage Service.
Select the Supervisor from the list, and then click Next, Next.
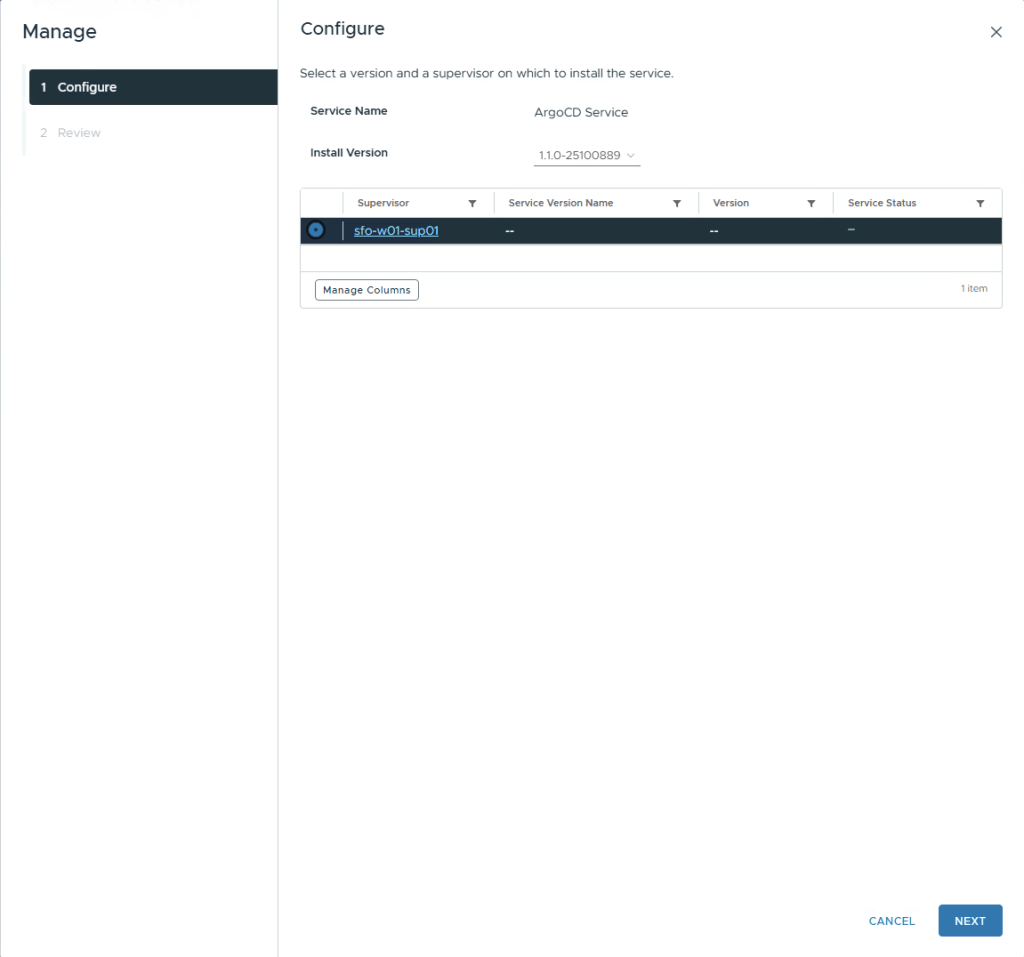
Last step there’s no need to enter any data into the input, just click Finish.
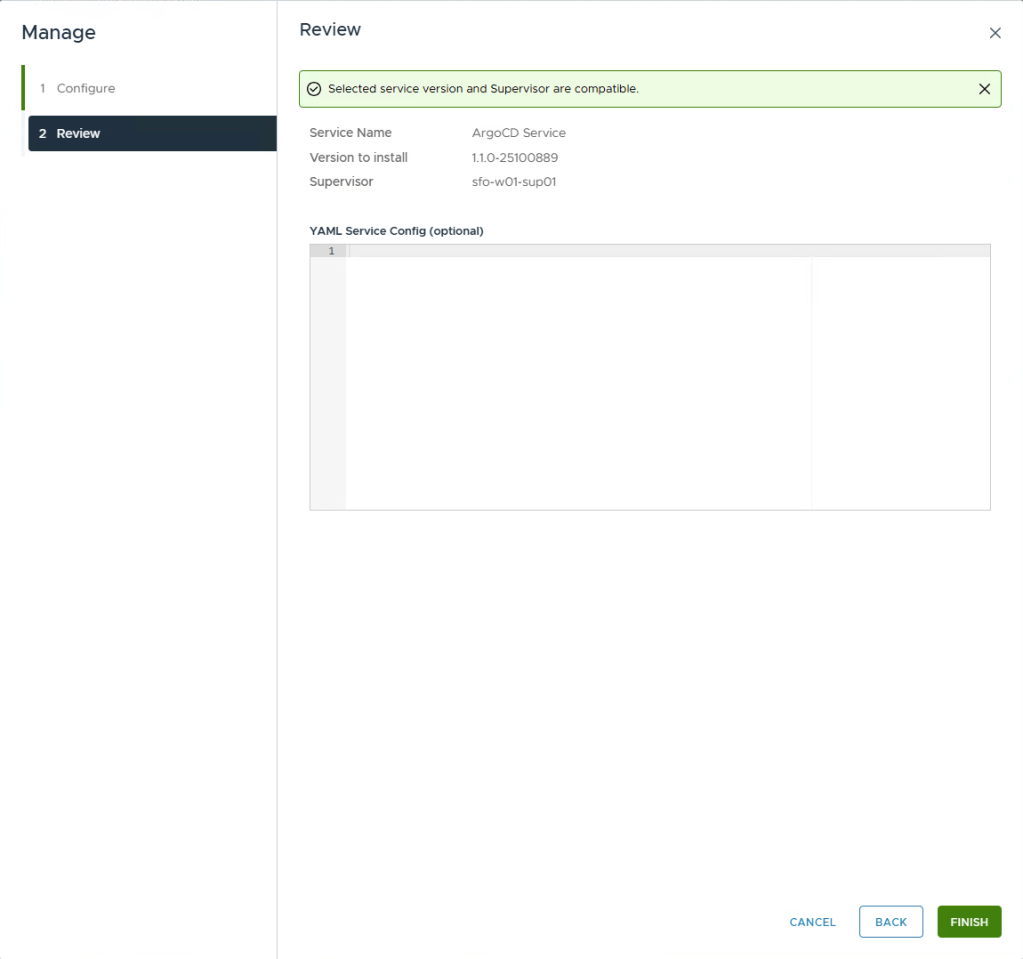
The ArgoCD Service is now installed, and enabled on your Supervisor. Your end-users can now self-service create ArgoCD instances.
Deploying ArgoCD using kubectl
In your VCF Automation AllApps tenant, create a vSphere Namespace.
You will require both kubectl binary, and vcf-cli installed on your machine.
We’re now going to create two contexts using vcf-cli.
- One is using the cci interface towards your tenant.
- One is using the k8s interface so that you can create a service account using the supervisor.
Let’s first create a context using the CCI interface. You will need the URL to your VCF Automation, the tenant name, a API token, and your root certificate if you’re using signed certificates.
If you don’t know where to create a token, login to the automation interface, click your Username in the top right corner, select My Account, API Tokens, and then create one. Please note you need to save your token in a secure location since you wont be able to view it when you close the dialogue window.
You require the certificate, don’t use –skip-tls-verify because when you at some point want to login to a VKS cluster, pinniped doesn’t trust VCF Automation certificate.
$ vcf context create tenant --endpoint https://automation.rainpole.io --type cci --ca-certificate rainpole.cer? Provide API Token: JJ0kJ6CBMdaU180dXn6MW2N2RvRQvjS0? Provide Tenant Name: nemeaSuccessfully logged into automation.rainpole.ioYou have access to the following contexts: tenant tenant:kim-argocd-drx5d:kim-johansson tenant:kim-dev-dfs8y:kim-johansson tenant:kim-prod-vlryx:kim-johanssonIf the namespace context you wish to use is not in this list, you may need torefresh the context again, or contact your cluster administrator.To change context, use `vcf context use <context_name>`[ok] successfully saved context: tenant[ok] successfully saved context: tenant:kim-argocd-drx5d:kim-johansson[ok] successfully saved context: tenant:kim-prod-vlryx:kim-johansson[ok] successfully saved context: tenant:kim-dev-dfs8y:kim-johansson
Now let’s create one for the Supervisor context.
$ vcf context create supervisor --endpoint https://supervisor.arn.rainpole.io --type k8s --ca-certificate /vmware/trust_root_ca/rainpole.cer --username kim.johansson@arn.rainpole.io --auth-type basicProvide Password: Logged in successfully.You have access to the following contexts: supervisor supervisor:kim-argocd-drx5d supervisor:kim-dev-dfs8y supervisor:kim-prod-vlryxIf the namespace context you wish to use is not in this list, you may need torefresh the context again, or contact your cluster administrator.To change context, use `vcf context use <context_name>`[ok] successfully saved context: supervisor[ok] successfully saved context: supervisor:kim-prod-vlryx[ok] successfully saved context: supervisor:kim-dev-dfs8y[ok] successfully saved context: supervisor:kim-argocd-drx5d[ok] successfully saved context: supervisor:svc-supervisor-management-proxy-domain-c9[ok] successfully saved context: supervisor:svc-velero-domain-c9[ok] successfully saved context: supervisor:svc-secret-store-domain-c9[ok] successfully saved context: supervisor:svc-consumption-operator-domain-c9[ok] successfully saved context: supervisor:svc-tkg-domain-c9
Now we need to switch to one of the context.
vcf context use supervisor
First let’s find out what version of ArgoCD we can deploy. Don’t ask me why, but the version available is actually whats after “Example” in the “Description” field, i’ve asked this to be clarified better.
$ kubectl explain argocd.spec.versionGROUP: argocd-service.vsphere.vmware.comKIND: ArgoCDVERSION: v1alpha1FIELD: version <string>DESCRIPTION: Version specifies the ArgoCD Carvel Package version to deploy. The version must follow the pattern: X.Y.Z+vmware.W-vks.V Example: "3.0.19+vmware.1-vks.1"
Now create a argocd.yaml manifest in a text-editor with the following, and use the version from the above command to specify the version you can deploy.
apiVersion: argocd-service.vsphere.vmware.com/v1alpha1kind: ArgoCDmetadata: name: argocd-demo namespace: <the name of your namespace>spec: version: 3.0.19+vmware.1-vks.1
Now we’ll switch context to your tenant context that’s using CCI (Cloud Consumption Interface), and select the vSphere Namespace where you want to instantiate ArgoCD.
$ vcf context use? Select a context [Use arrows to move, type to filter]> tenant:kim-argocd-drx5d:kim-johansson tenant:kim-dev-dfs8y:kim-johansson tenant:kim-prod-vlryx:kim-johansson
We’ve now selected the vSphere Namespace we’re working in, now we will use standard kubectl to apply our manifest.
$ kubectl apply -f argocd.yaml argocd.argocd-service.vsphere.vmware.com/argocd-demo created
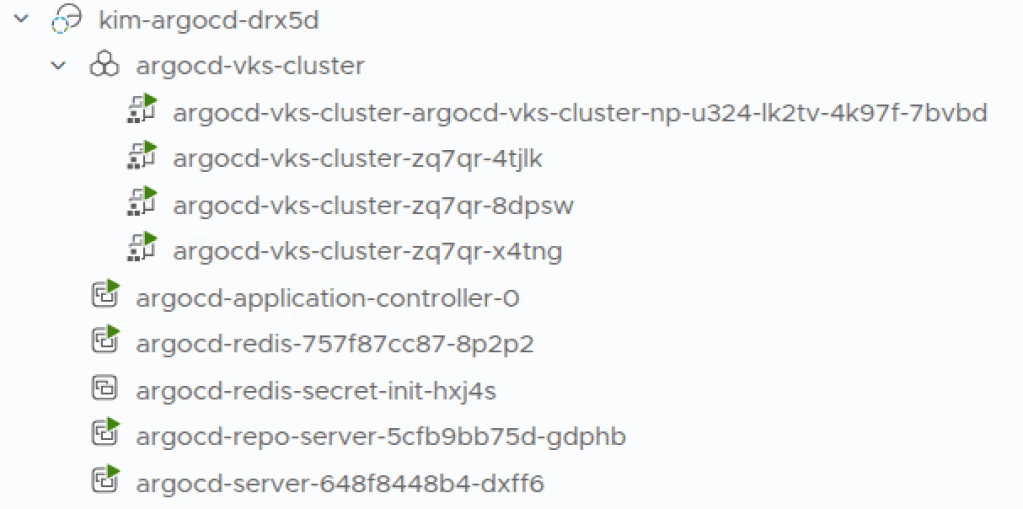
If you have a look in the vSphere Client, you can now see multiple vSphere Pods being spun up in your namespace.
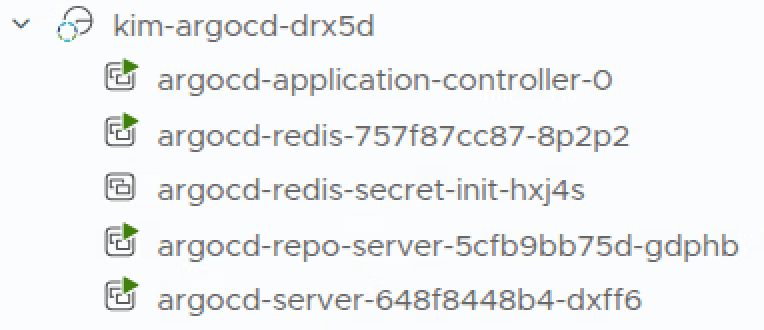
It’s very quick, but if you want to check the status, run this command. Note that the secret should not be running, it’s completed. In all the below commands, please make sure you replace -n kim-argocd-drx5d with your own namespace.
$ kubectl get po -n kim-argocd-drx5dNAME READY STATUS RESTARTS AGEargocd-application-controller-0 1/1 Running 0 109sargocd-redis-757f87cc87-8p2p2 1/1 Running 0 109sargocd-redis-secret-init-hxj4s 0/1 Completed 0 2m11sargocd-repo-server-5cfb9bb75d-gdphb 1/1 Running 0 109sargocd-server-648f8448b4-dxff6 1/1 Running 0 109s
Now let’s get the public ip that your ArgoCD has recieved, so that we can login to it. Below that would be 172.16.44.8
$ kubectl get svc -n kim-argocd-drx5dNAME TYPE CLUSTER-IP EXTERNAL-IP PORT(S) AGEargocd-redis ClusterIP 10.96.0.83 <none> 6379/TCP 3m24sargocd-repo-server ClusterIP 10.96.1.103 <none> 8081/TCP 3m24sargocd-server LoadBalancer 10.96.1.124 172.16.44.8 80:30740/TCP,443:31728/TCP 3m24s
ArgoCD will be deployed using a random password, let’s retrieve that password and change it.
$ kubectl get secret -n kim-argocd-drx5d argocd-initial-admin-secret -o jsonpath='{.data.password}' | base64 -dYdfZb4jfZ9JsCTTj
Now we can login using the ArgoCD CLI.
$ argocd login 172.16.44.8WARNING: server certificate had error: tls: failed to verify certificate: x509: cannot validate certificate for 172.16.44.8 because it doesn't contain any IP SANs. Proceed insecurely (y/n)? y Username: adminPassword: 'admin:login' logged in successfullyContext '172.16.44.8' updated
And change the password.
$ argocd account update-password*** Enter password of currently logged in user (admin): *** Enter new password for user admin: *** Confirm new password for user admin: Password updatedContext '172.16.44.8' updated
Last step is that we need to create a service account for ArgoCD in the vSphere Namespace. supervisor in the below command is the name of the context we created previously.
$ argocd cluster add supervisor --namespace kim-argocd-drx5dWARNING: This will create a service account `argocd-manager` on the cluster referenced by context `supervisor` with full namespace level privileges. Do you want to continue [y/N]? ysupervisor cluster--system-namespace is not supported when it is Supervisor Cluster, we will create serviceaccount argocd-manager in ArgoCD namespace kim-argocd-drx5d for kubernetes resource managementStart permission checking for managing namespace of Supervisor Cluster{"level":"info","msg":"ServiceAccount \"argocd-manager\" created in namespace \"kim-argocd-drx5d\"","time":"2026-04-15T12:58:40+02:00"}{"level":"info","msg":"RoleBinding \"kim-argocd-drx5d/kim-argocd-drx5d-argocd-manager-role-binding\" created","time":"2026-04-15T12:58:40+02:00"}{"level":"info","msg":"Created bearer token secret for ServiceAccount \"argocd-manager\"","time":"2026-04-15T12:58:40+02:00"}Namespace kim-argocd-drx5d from Cluster 'https://supervisor.arn.rainpole.io:443' added
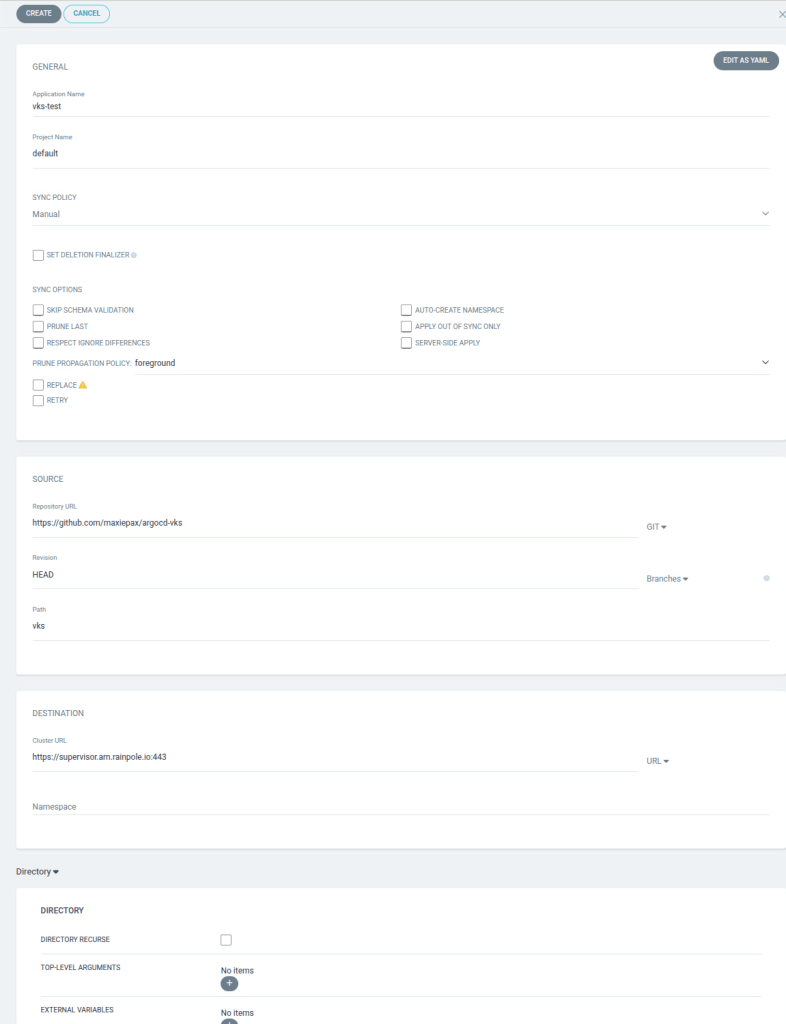
Now it’s time to go into ArgoCD and create an Application. Login to the webui and click Create Application. You’re welcome to try out the VKS deployment hosted in my git, but please note that you need to create your own fork, and then replace the Content Libraray cl-, Namespace and other items in it for it to work.
Please note, i’m not an ArgoCD Ninja, there’s LOTS of really cool options, please consult the ArgoCD manual to figure out all the settings.
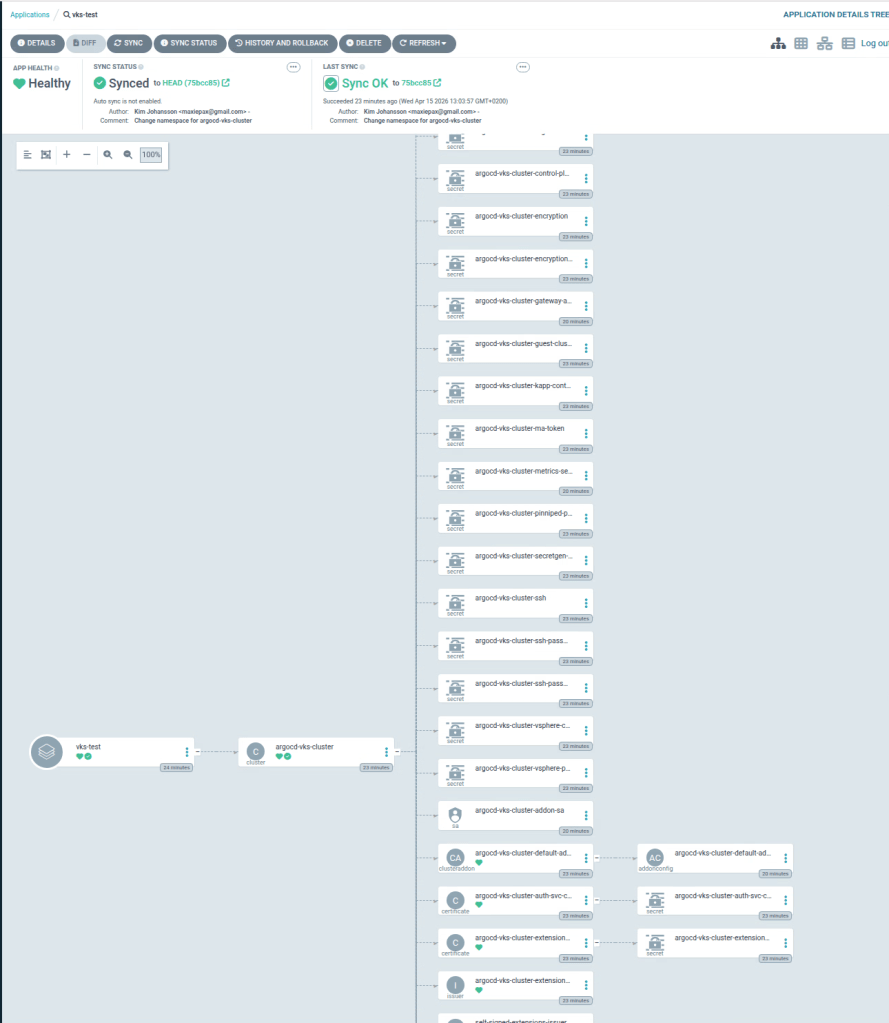
Since i didn’t check AutoSync (in demo’s, it’s just easier to be able to manually trigger it) we need to press Sync -> Synchronize. You’ll see it almost instantly start create the VKS cluster since the desired state is not what’s in the vSphere Namespace.
From the ArgoCD UI you will start seeing lots of items popping up.
And from the vSphere Client you’ll see it starting to create controller and worker nodes.
This was a quite simple example of just a VKS Cluster. You can put multiple manifests for infrastructure, but also now start creating an “App of Apps” where you also load the application onto the infrastructure.
I will soon be adding more ways to instantiate ArgoCD, such as using Terraform, and VCFA Blueprints.
