After creating a Project, and a vSphere Namespace we can start consuming Services. Pre-installed in the vSphere Supervisor is a Operator called VM Service. This Service allows you to create a yaml manifest that defines the desired state of a Virtual machine, and have this provisioned inside of a vSphere Namespace.
Regardless if you choose to use the VM Service via UI, HTTP-REST, kubectl, terraform, or ArgoCD, it’s going to require a manifest that is sent to the Supervisor via VCF Automation. The Supervisor will then create the VM from the specification in the manifest.
A common question is, wait, so the Supervisor does this using Kubernetes voodoo, does this mean that the VM is actually nested inside of a Kubernetes cluster?
No! The Supervisor creates a standard Virtual Machine in vCenter. It’s just created by, managed by, and deleted by the Supervisor using desired state. This means you can’t (shouldn’t) try modify or touch the VM inside vCenter. If you in vCenter power the VM off as an example, the Supervisor will power it back on, because the desired state the Supervisor has is PoweredOn.
A good way to figure out the syntax required to create the manifest is to use the VCF Automation UI, because when you go through the wizard you will see the manifests being rendered in real-time.
Creating a VM using the VM Service
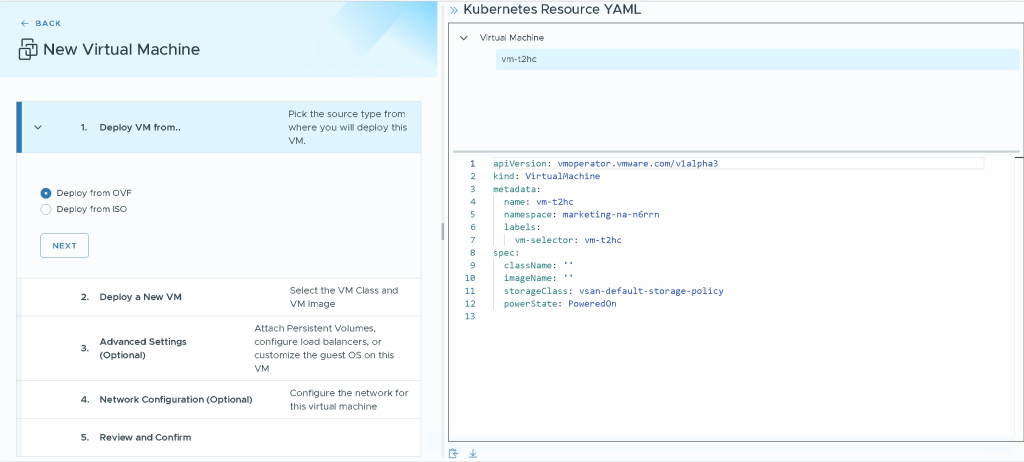
When logged in to your Organisation, click Build and Deploy.
On the left side menu, right below Event Subscriptions you will find a drop-down menu that selects the vSphere Namespace you are currently working in. It’s very important to understand that if you have multiple vSphere Namespaces you need to make sure you’ve got the right namespace selected, or you will be created resources in the wrong place. When you’ve selected a vSphere Namespace the available services will populate beneith it.

Select the Virtual Machine service, and then click Create VM.
On the left hand side we’ve got the options that we can select, and whenever we choose something it is instantly reflected on the right hand side in the form of the manifest. In the end of the wizard this/these manifests will either get submitted, downloaded, or both.
In the Content Library us-west previously created, there are some Ubuntu Cloud images that we can use, since they’re packaged in OVF format and prepped with cloud-init. Select Deploy from OVF and click Next.
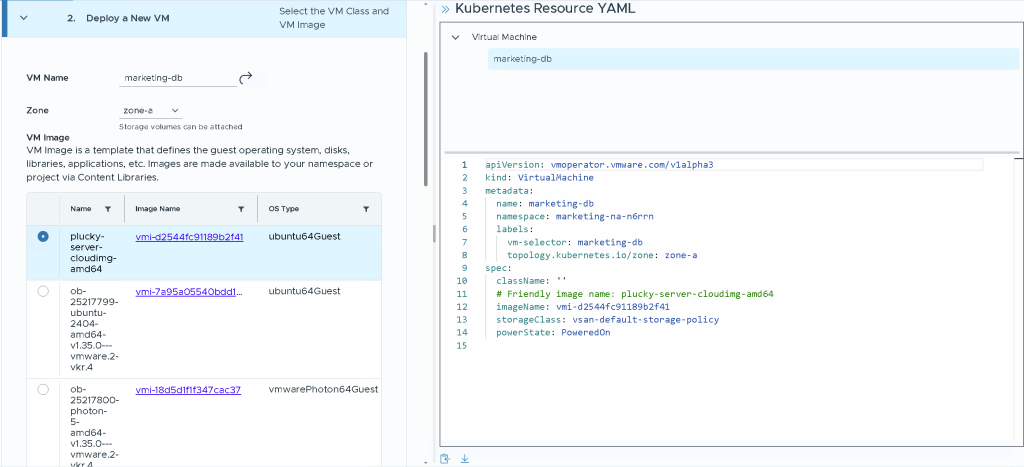
Give the VM a reasonable name, and select one of the Zones, you can leave it at Automatic but then you won’t be able to assign additional harddrives to it, which we will be doing. From the VM Images, select the plucky-server (Ubuntu 25.04) image. Pay close attention to how the manifest is updated when you select things.
Scroll further down to VM Class, this is the t-shirt sizes available from your Provider. Select one and then scroll further down.
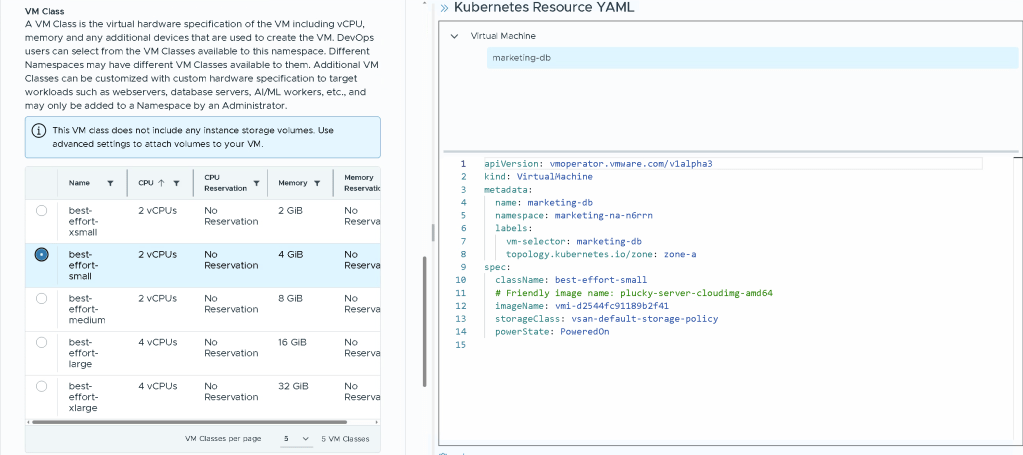
We need to select a Storage Policy, If you’re using vSAN this will quite easy since you may only have the choice of vSAN Default Storage Policy. If you’re running Stretched (Metro Storage) you may have the option to choose Stretched, Site-A, and Site-B, but this is up to your provider.
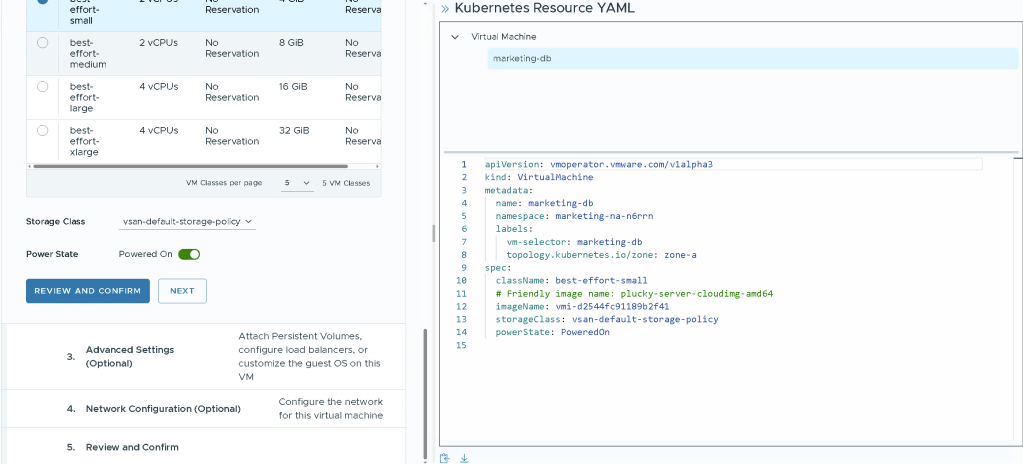
You could click Review and Confirm and create the VM, but we want to customise it a bit more, Select Next.
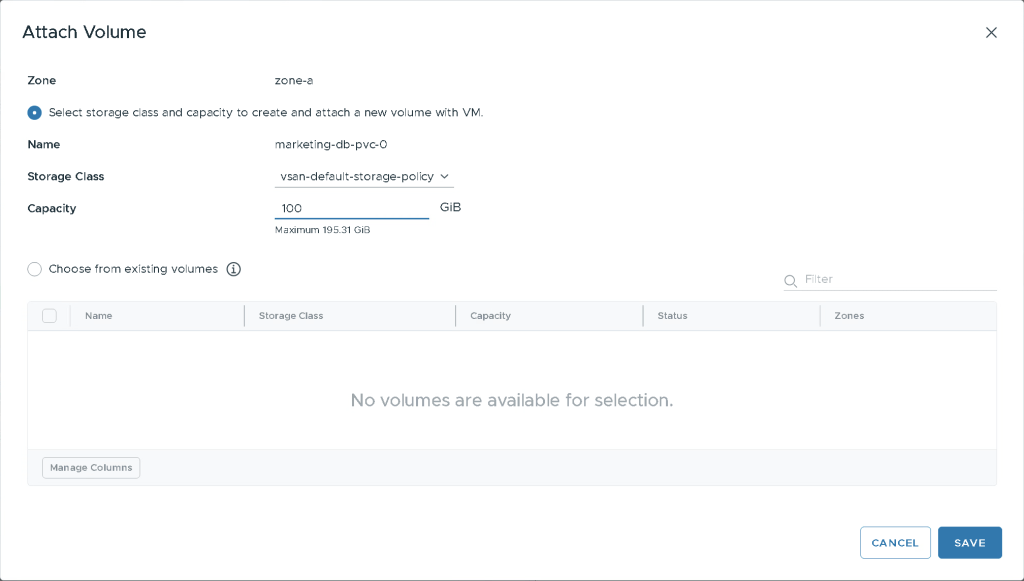
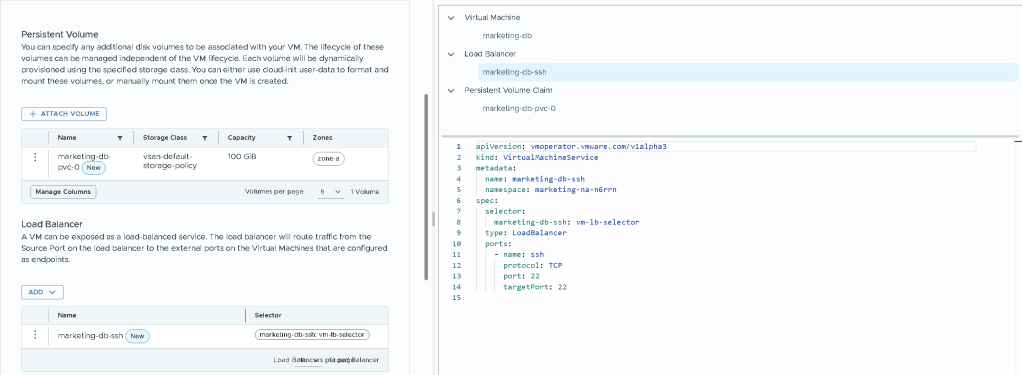
We’re going to add a Persistent Volume Claim, select Attatch Volume. Enter the Capacity 100GB, and click Save.
The Ubuntu OVF Template comes with a 40GB os-drive. If you require more it’s easiest to just add a Persistent Volume Claim, this device will now be available as /dev/sdb in Ubuntu. Note that when you click Save, you now have two manifests on the right hand side, one for the Virtual Machine, and one for the Persistent Volume Claim.
As it is, if this Virtual Machine where to be created it would only be reachable from within the VPC. It would be able to communicate outbound via the default SNAT from the VPC, but if you want to host something on this VM you need to create a load balancer. This VM will be a Database for a Kubernetes application, but let’s ensure that we can reach it via SSH to configure it.
Under Load Balancer, select Add, New.
Provide a name for the service that makes sense. We can add multiple ports to the loadbalancer, but for now we’ll just create one. In the name field input ssh, and then 22 in both port and target. If you wanted to you could have another port assigned on the outside, being forwarded to port 22 to the VM.
Click Add, and then Save.

We’ve now created both a PVC, and a LB service, you now have 3 manifests.
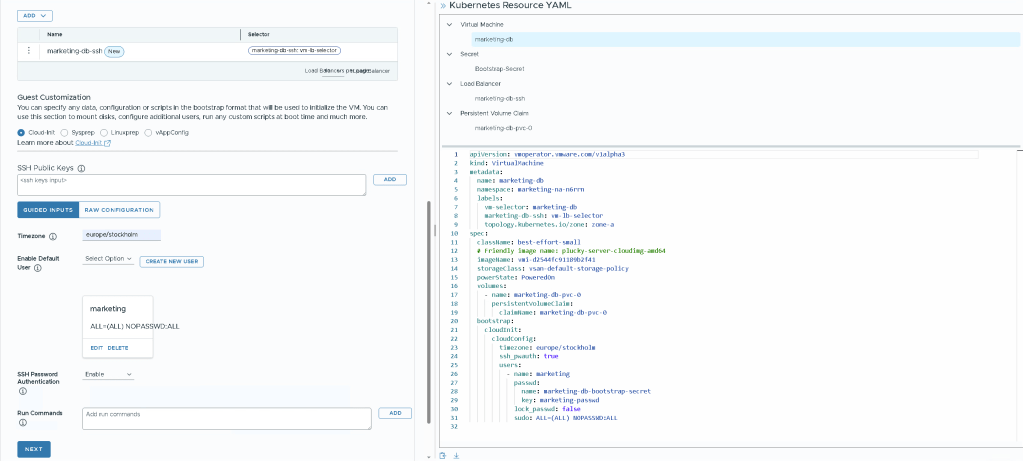
We can now customise the operating system, for Linux this is usually done using cloud-init.
If you’re not a cloud-init ninja, i would recommend using the Guided inputs for an easy life. If you are a ninja however you can toggle to Raw Configuration to input whatever cloud-init you desire.
In Timezone input your timezone, you can find the linux timezones here https://en.wikipedia.org/wiki/List_of_tz_database_time_zones
The Ubuntu Cloud Image does not have a local user, so we need to instruct cloud-init to create one. Select Create New User.
Input a Username, Password, and select Enable for Default Sudo. If you’re not used to Linux, Sudo means the user can elevate it’s priviliges to become local administrator. Click Save.
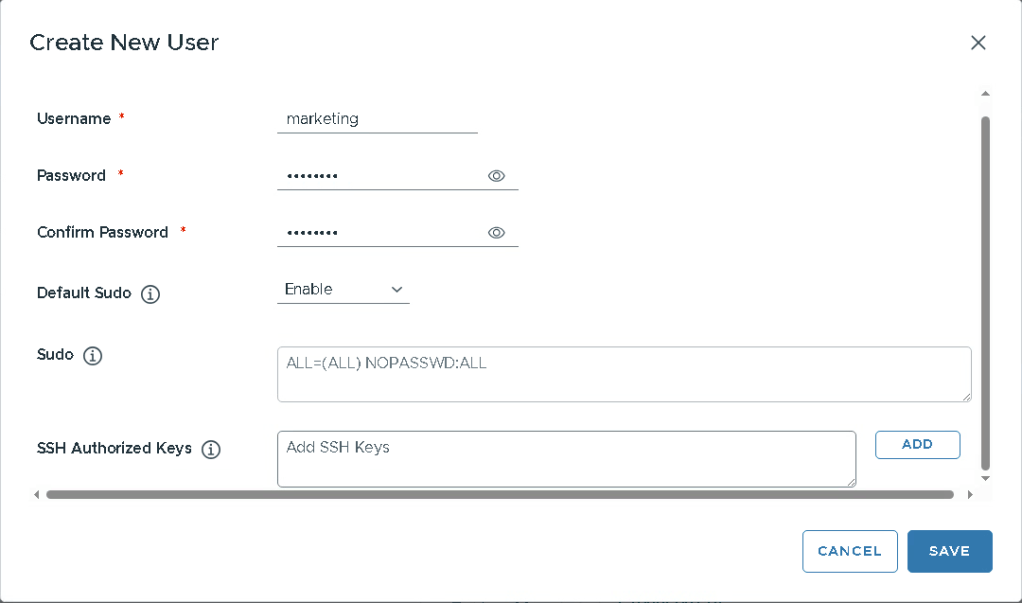
To be allowed to login using SSH and Password (instead of SSH keys), we need to select Enable under SSH Password Authentication.
If you want any packages installed, you can enter them one by one under Run Commands, or install them later when the VM has been created. Note that you now also have a Secret manifest, that contains the password you entered for the user.
Select Next.
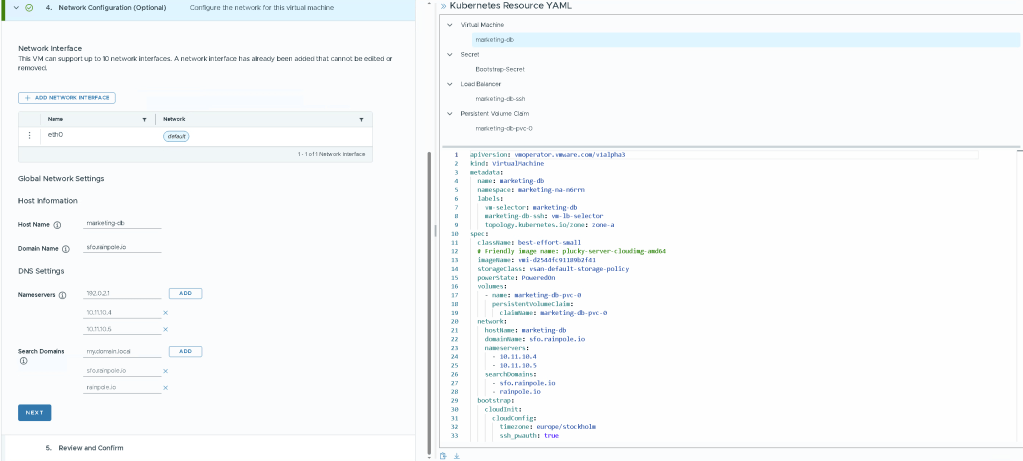
Final stretch is the Network Configuration. By default the VM has one network card, but you can add additional if you want to.
Enter the Hostname, Domain Name, Nameservers and Search Domains. Then click Next.
Before we click Deploy VM. This would commit the Manifest to the Supervervisor, via VCF Automation. At the very bottom of the rendered manifest there is a downward pointing arrow. If you click this you will recieve a .zip file with the 4 manifests. You could use these manifests to apply them using kubectl -f <file>, or committing them to a git repository and letting ArgoCD handle updating the state of the comitted manifest.
For now, let’s keep it easy and just create Deploy VM. VCF Automation will now pass the manifests to the Supervisor, the Supervisor will use the specification to have vCenter create the VM. This usually takes roughly a minute.
Conclusion
You can create a Virtual Machine in many ways, but whatever you choose they all get created the same way. You can create a VM using the UI, and then modify it using kubectl. Or go completely devops and just commit the manifests to a git repository, and use the ArgoCD service to monitor the git repo and create everything for you.
