Okey, if you’re following along on the blog series, now we’re getting to the fun stuff!
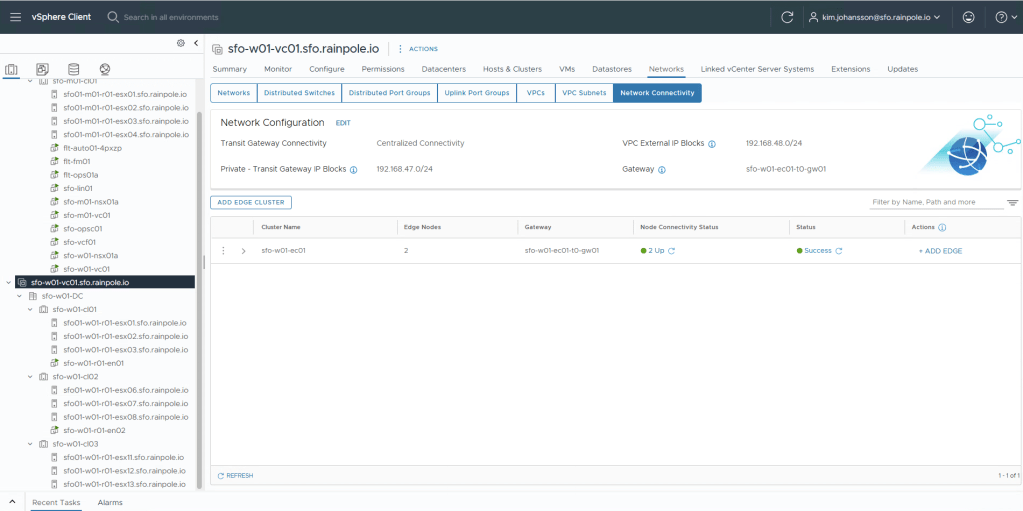
To recap, at this point i’ve created 3 clusters in a Workload Domain, and also deployed a NSX Edge-Cluster that spans two of the Clusters to gain high availability on network ingress/egress.
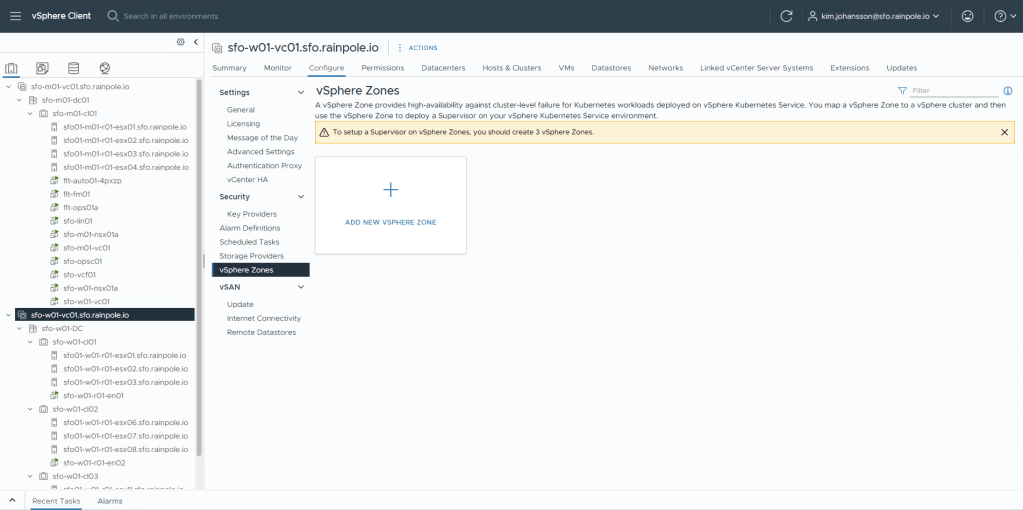
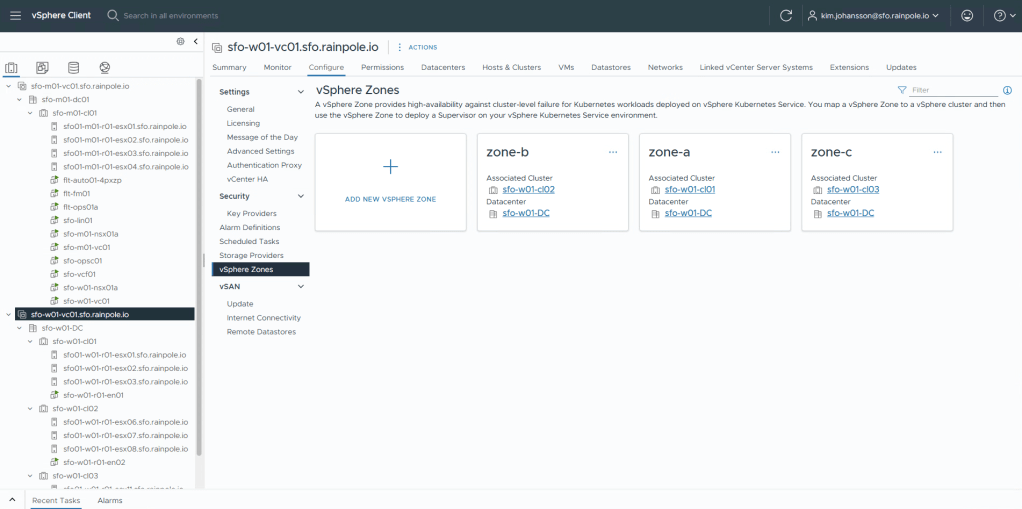
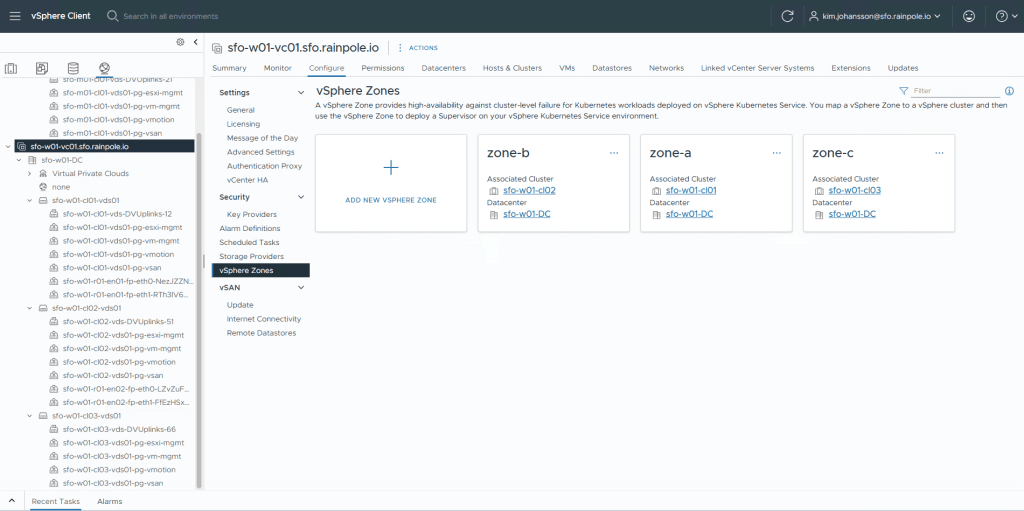
The first thing we need to is define our different Zones. This instructs the Supervisor where it can place deployments, and the zones are further exposed to your users in VCF-A, so i guess choose your naming convention wisely 🙂
Navigate to the vCenter object for your workload domain, Configure menu, vSphere Zones.
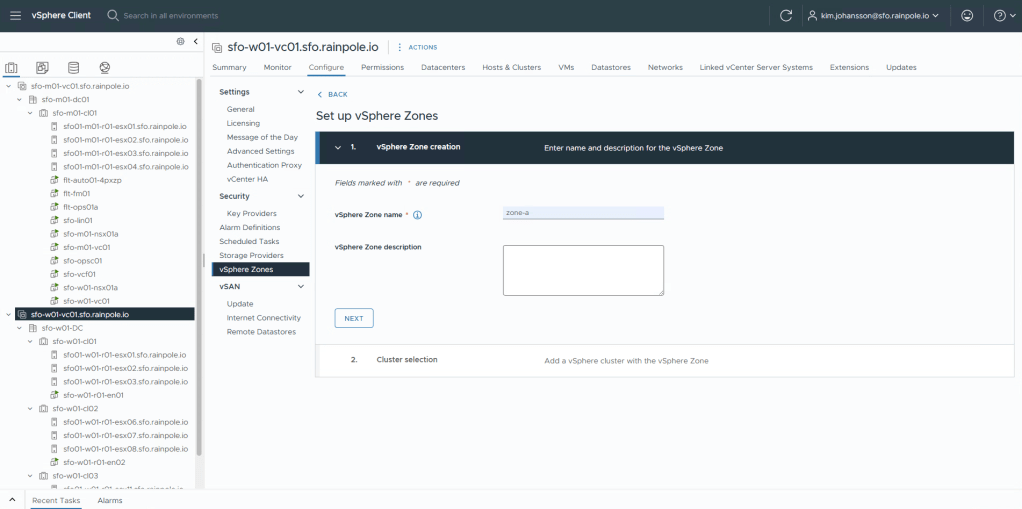
Now click Add new vSphere Zone, and create 3 Zones. Start by defining the name.
Select the cluster backing this Zone. Click Finish.
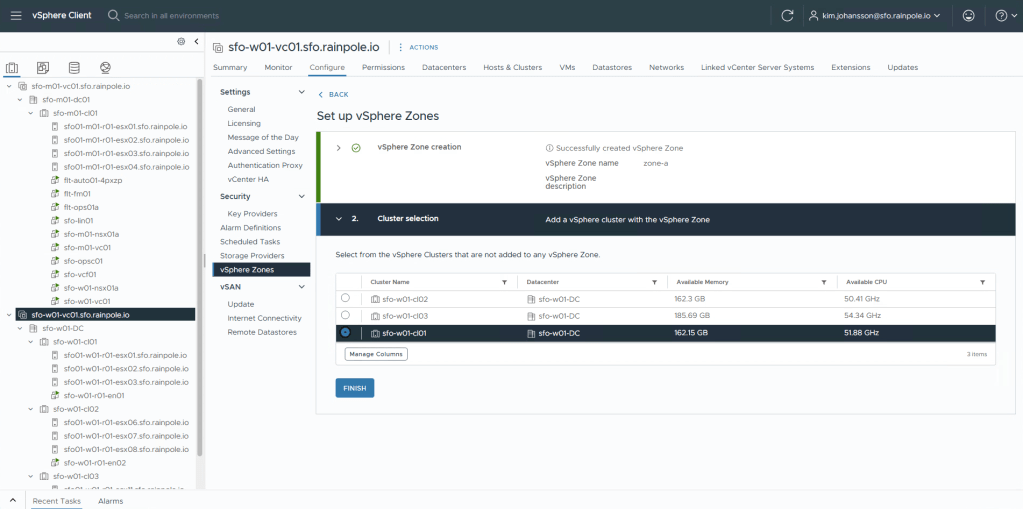
Rinse and repeat two more times.
The Supervisor service, even though it creates 3 nodes on 3 different clusters requires the same VLAN backing for the actual Supervisors. We thus need to create a PortGroup on each VDS with the same VLAN ID.
I’ve thus created the PortGroups
– sfo-w01-cl01-vds01-pg-vm-mgmt
– sfo-w01-cl02-vds01-pg-vm-mgmt
– sfo-w01-cl03-vds01-pg-vm-mgmt
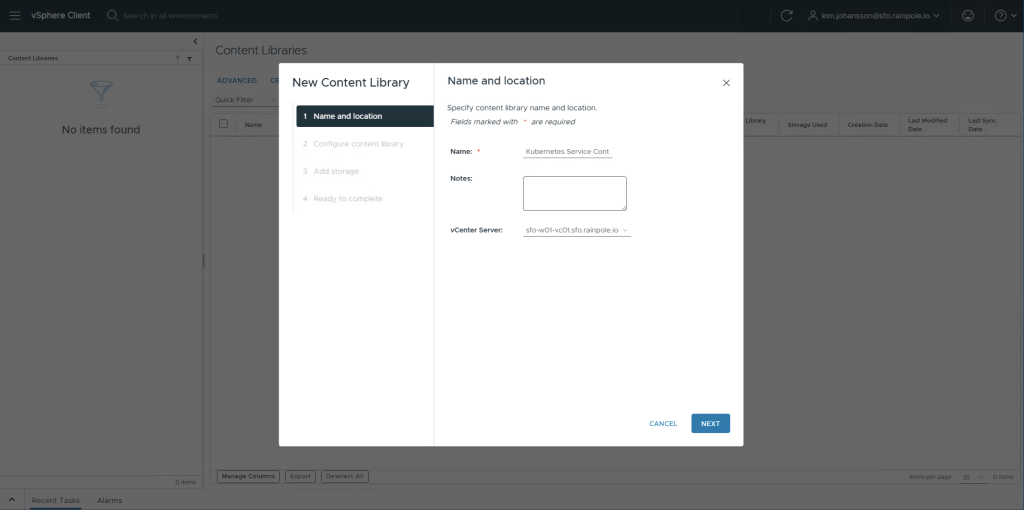
Finally we need to create two Content Libraries. One will be the “Service” library which contains all the “TKR”s, these are the images used to actually create the Users k8s clusters.
The other one is the “Supervisor” library, which contains the upgrade binaries for the actual Supervisor.
Click vSphere Client, Content Library, Create, now enter Kubernetes Service Content Library for the name, and select your Workload Domain vCenter server where you are enabling the Supervisor Service. Click Next.
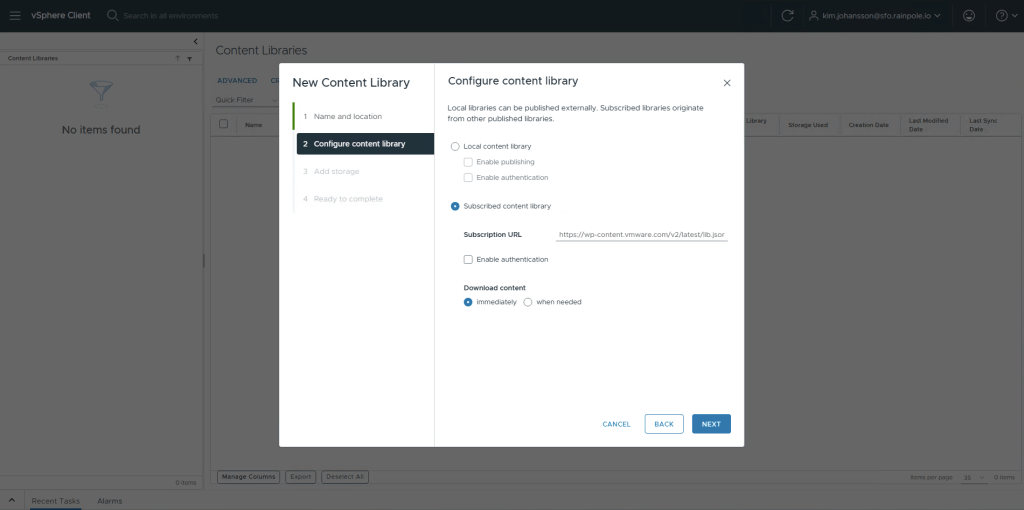
Select Subscribed Content Library, and enter https://wp-content.vmware.com/v2/latest/lib.json
Click Next, accept the Security Certificate by clicking Next, accept teh default security Policy, click Next. Select the vSAN from one of the three clusters, i’ll select the cl01 datastore, Next and Finish.
Now we need to create one more for the Supervisor, same procedure but instead use the name Kubernetes Supervisor Content Library and url https://wp-content.vmware.com/supervisor/v1/latest/lib.json
You should now have two content libraries.

Enabling the Supervisor
Now currently there is no way to enable the Supervisor over 3 Zones using the UI, this means we will need to do this via the API. Fear not! Navneet Verma has written a script that does this for you that you can find here.
His script has support for multiple different network backings, but we need to use VPC for VCF-A. So grab the enable_on_zone_vpc.json and enable-wcp.sh files and put on a suitable linux machine.
Replace variables to reflect your environment. Passwords are only used for initialization and dont need to be service accounts. Zones need to match (case-sensitive) the zones you previously created.
MGMT_STARTING_IP defines the range of ips that will be used for the 3 supervisors, the supervisor VIP, and the supervisor maintenance address (total of 5). In this case 151-155 would be used.
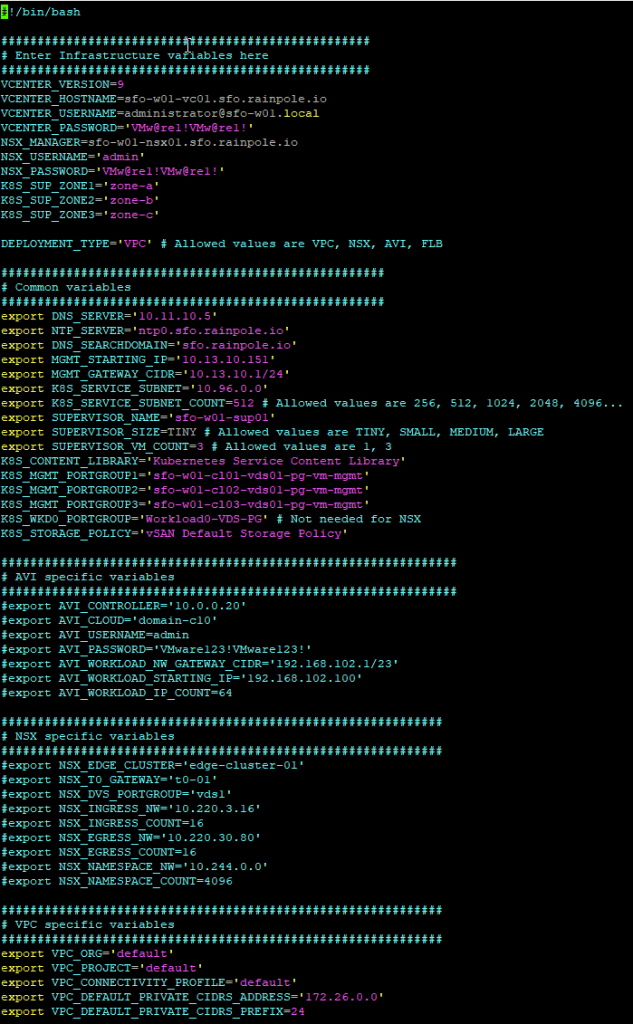
Now save the config, and run the shell script. There wont be a lot of output other than some verifications, and it then kicks off the job. If all goes well you should see a “hash”, and thats it.

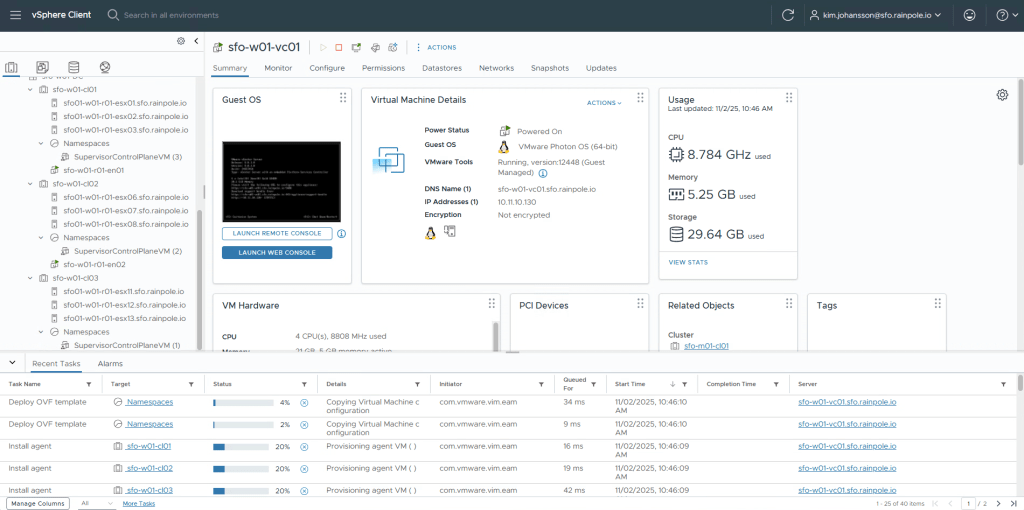
If you switch to the vSphere Client, you will now see there’s a Namespace, and a Supervisor node created in each of your 3 clusters. After about 5 minutes, it should be done deploying, however it will take a bit longer for all the kubernetes services to get up and running.
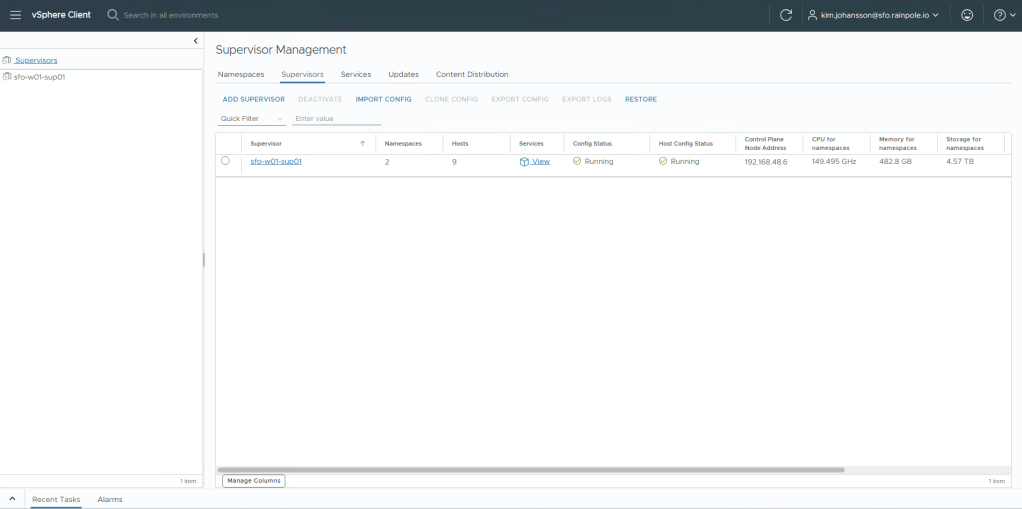
To check on this, click the vSphere Client, and then select Supervisor Management.
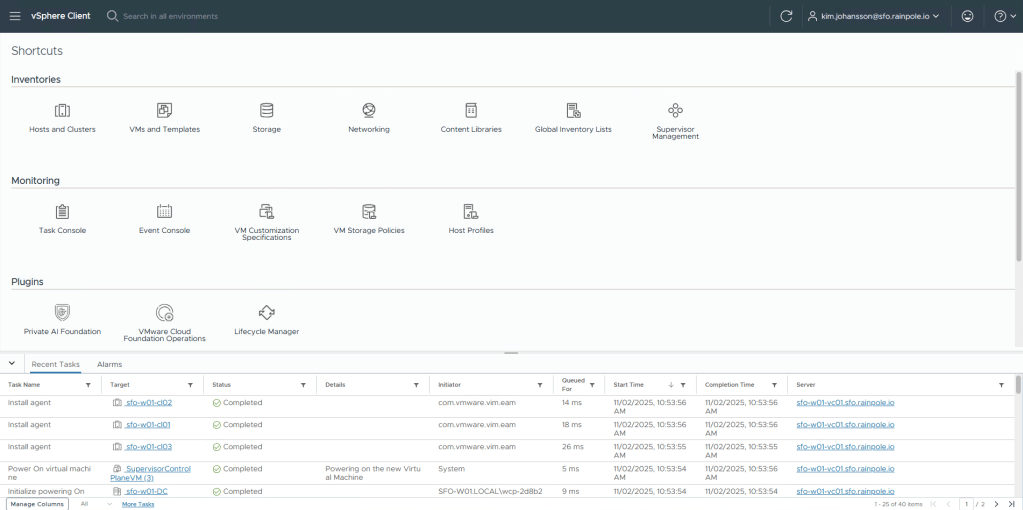
The Namespace menu will be empty, select Supervisors submenu, and then click the View text under Config Status.

When all these are green and resolved, then the Supervisor will be completely deployed and configured.
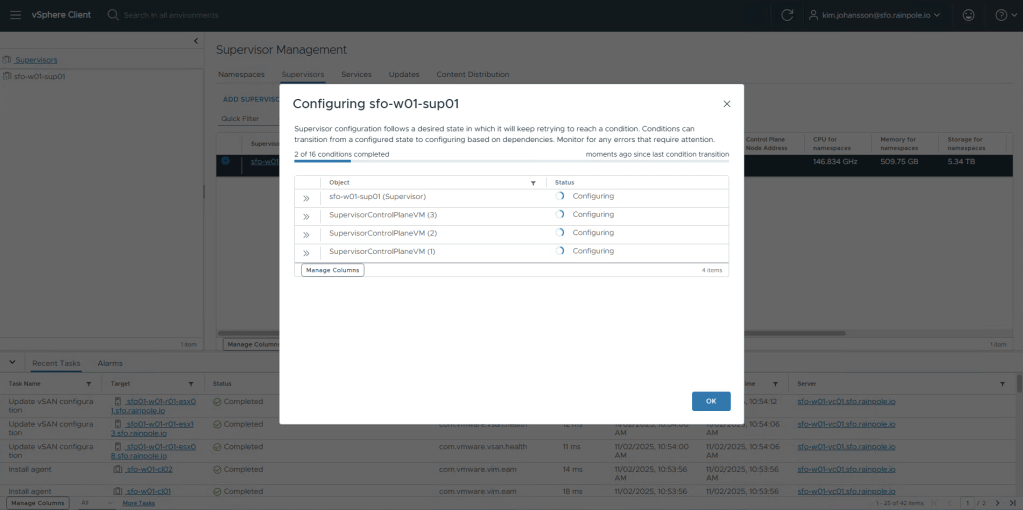
After a few minutes, the status will swap to Running, and we’re done!
Updating the Supervisor
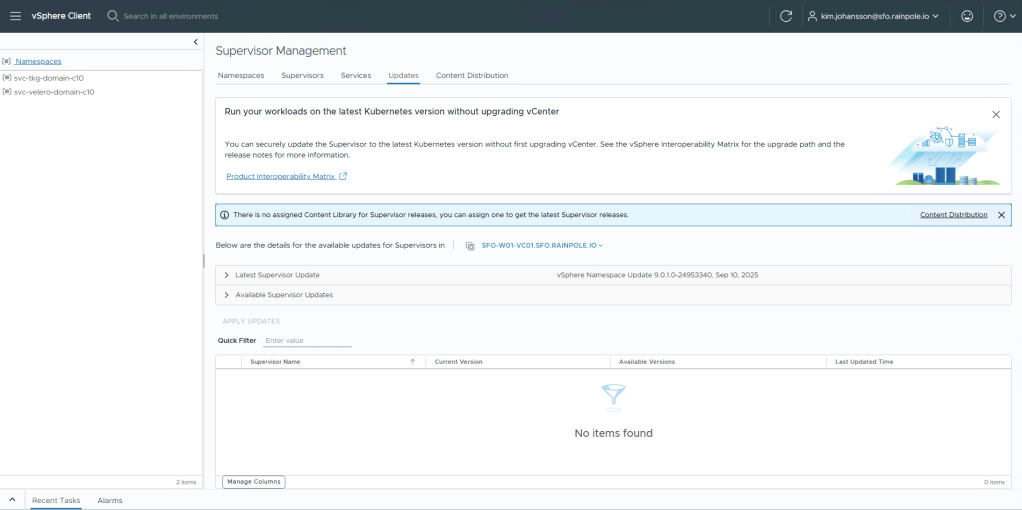
Let’s check if there’s any updates to the Supervisor. Sometimes new Operators(extensions) require a newer version of the Supervisor. Something really nice is that these upgrades are now decoupled from the vCenter version, so it’s really simple to upgrade.
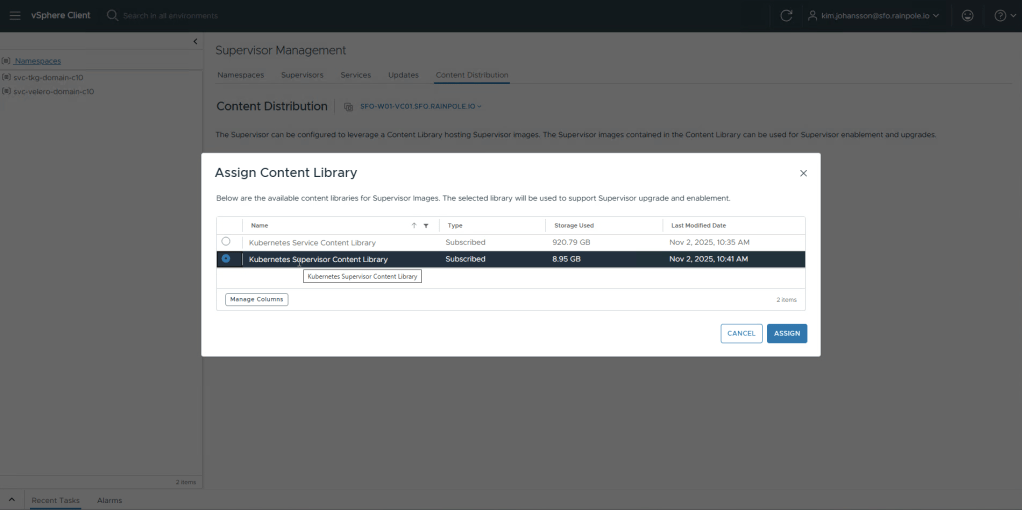
Click the Updates tab, and then on the blue ribon, Content Distribution.
What can catch you offguard here is that the Management Domain is selected, in the dropdown select the Workload Domain, and then click Assign.
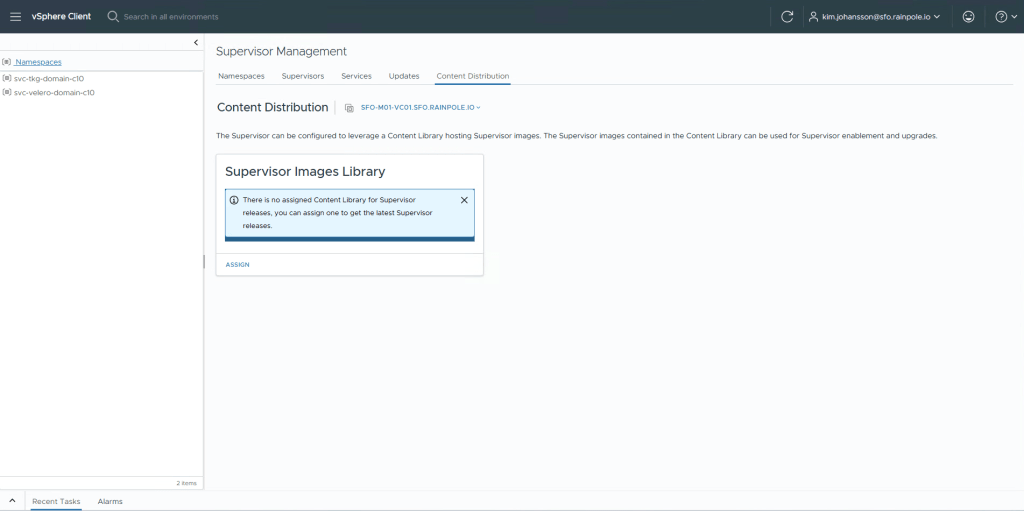
Select the Supervisor content library. Click Assign.
Go back to Updates tab. Under Available Supervisor Updates you will be able to see any updates, currently since i’m running the latest, it’s empty.

