Creating a workload domain involves multiple steps.
- Image the hosts with the correct ESXi version. Please refer to the Bill of Material (BOM) that correlates to the version of VCF you are deploying. If you are deploying, or running VCF 9.0.1.0 you would go to https://techdocs.broadcom.com/us/en/vmware-cis/vcf/vcf-9-0-and-later/9-0/release-notes/vmware-cloud-foundation-90-release-notes/vmware-cloud-foundation-bill-of-materials.html and find that the correct version of ESXi to install is ESX 9.0 build 24755229.
- Perform pre-req’s, in short these would be.
- Set Hostname, Domain
- Re-regenerate self-signed certificate to include the SAN field.
- configure DNS, NTP services.
- Create, or Expand a network pool so that you have enough free IPs to add the hosts.
- Commission the hosts into the inventory of VCF (sddc-manager).
- Create, or expand a workload domain/cluster.
I’m going to assume that you can do basic configuration of an ESXi hypervisor according to the documentation.
Once you’ve installed and configured your ESXi hosts we need to create a Network Pool. This is pool of IPs for different use-cases (vSAN, VMotion, NFS) that we can use unattended when deploying new hypervisors into production.
Login to your Management vCenter server. and click vSphere Client to bring up the Shortcuts menu.
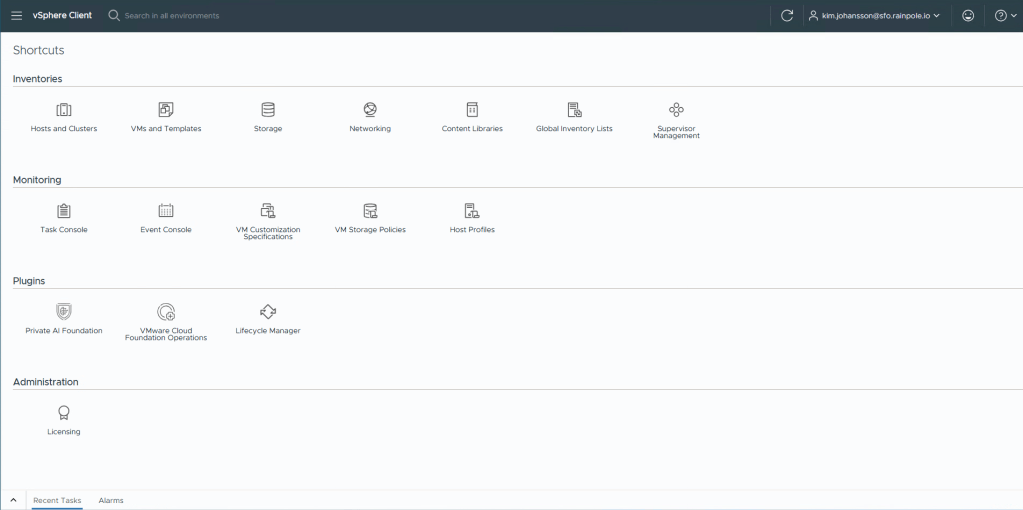
Select Global Inventory Lists.

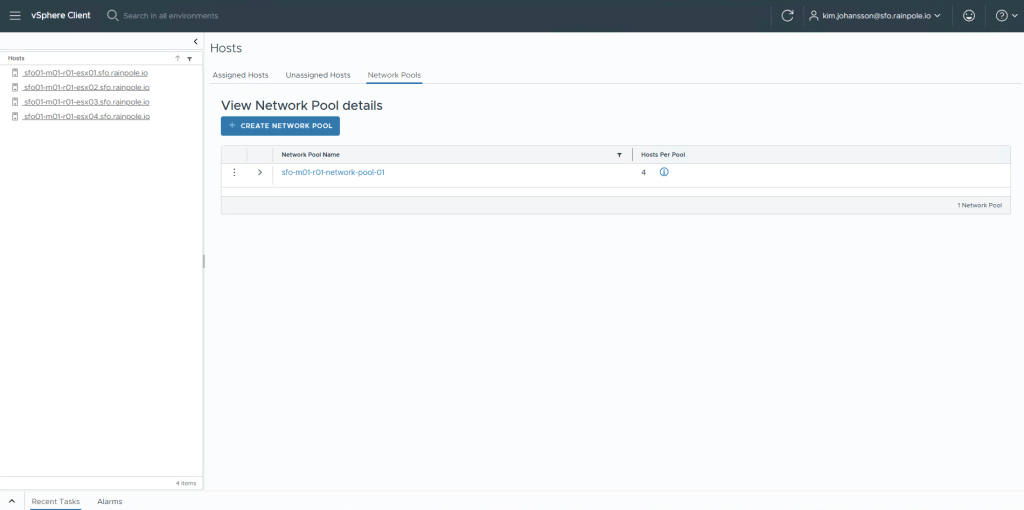
Now select Hosts, and then Network Pools, followed by + Create Network Pool.
Your hosts will already have a Management IP address that is static for their management interface. Even though hosts will of course have static ips for vSAN, VMotion etc, we still need to provide a range where we can automatically use these. If you havn’t already filled in the Planning and Preparation Workbook, you should, cause this is where you will figure out what VLAN and IP ranges you need to enter.
Open up your Planning and Preparation workbook, and open up the Yellow tab called VI Workload Domain Rack Config. It should look like this.
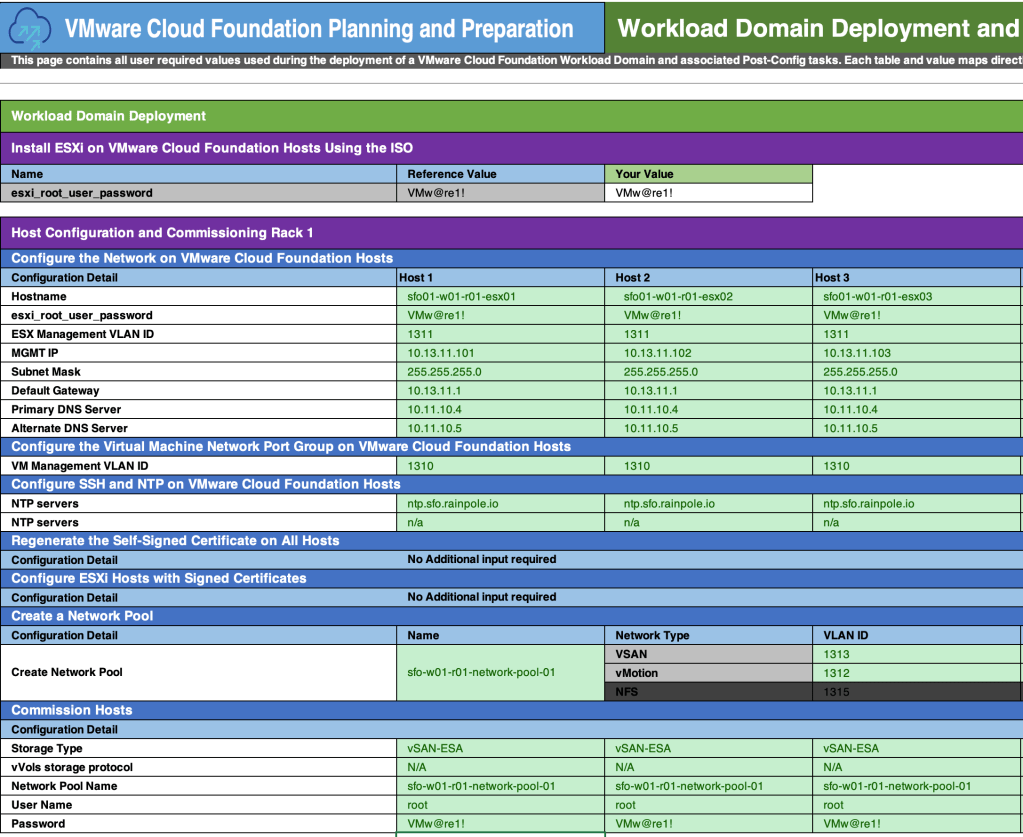
Based on the information provided in the Planning and Preparation guide, we should configure the network accordingly. Click Save.

We now have two Network Pools, one for our Management Domain, and one for our Workload Domain.

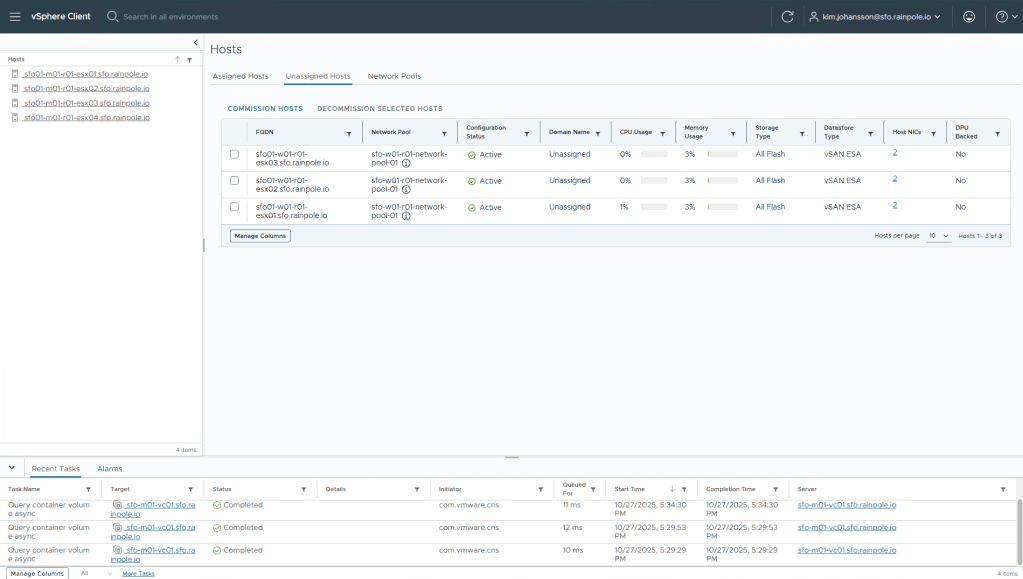
Next step is to Commission our hosts, using this Network Pool, Select Unassigned Hosts.
This is a list of all the hosts that are currently in your VCF Inventory, but not put into use yet. (They would appear in the Assigned Hosts tab). Click Comission hosts.

Read through the pre-requisits closely and ensure you have done all the steps, if you’ve missed something the comissioning will fail. Click Proceed.

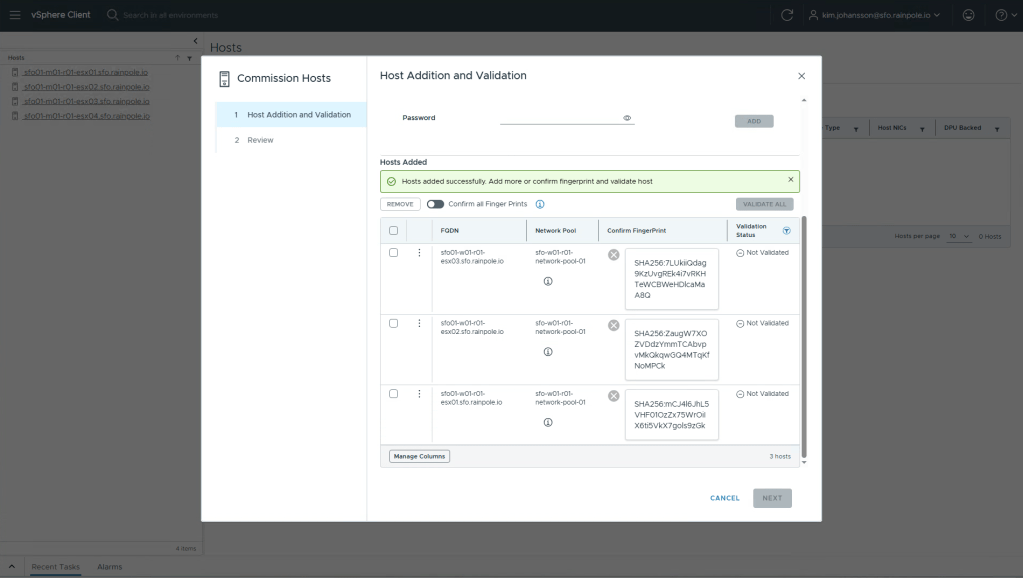
From the Planning and Preparation document, fill in the details for each of the hosts you wish to add, and select Add.
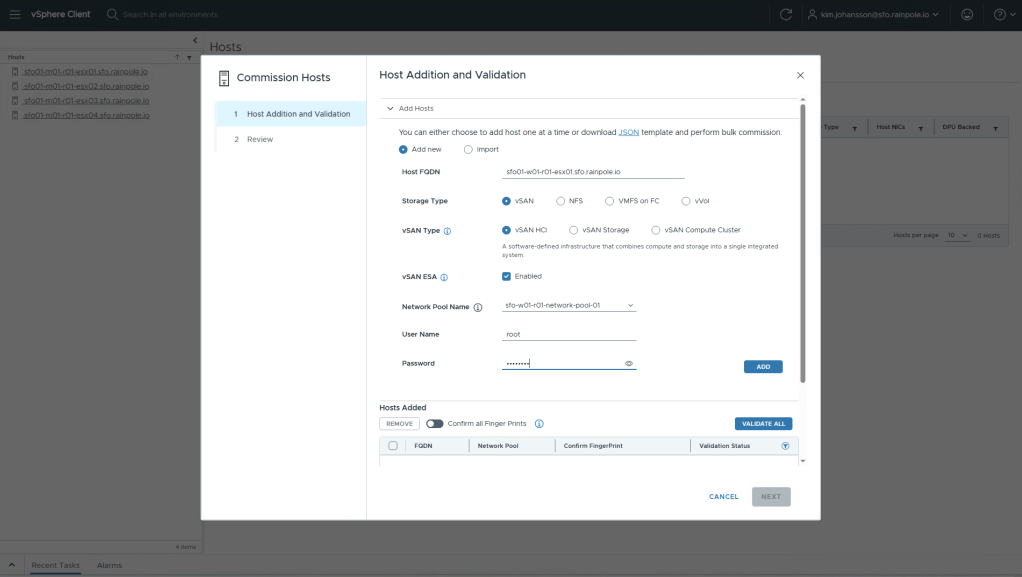
Once you’ve added all your hosts, toggle the Confirm all Fingerprints toggle. And click Validate All. This will kick off a validation workflow that will login to each of the esxi hosts to verify that everything looks as we expect it too, to successfully create a new workload domain.
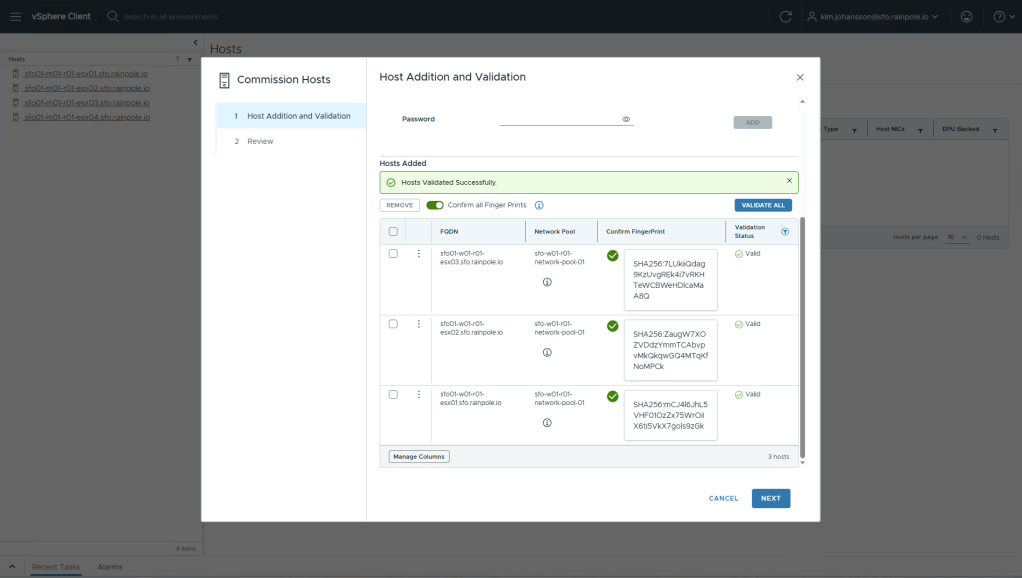
If you did everything right, you should be greeted by a nice green banner saying everything was validated successfully, and you can click Next.
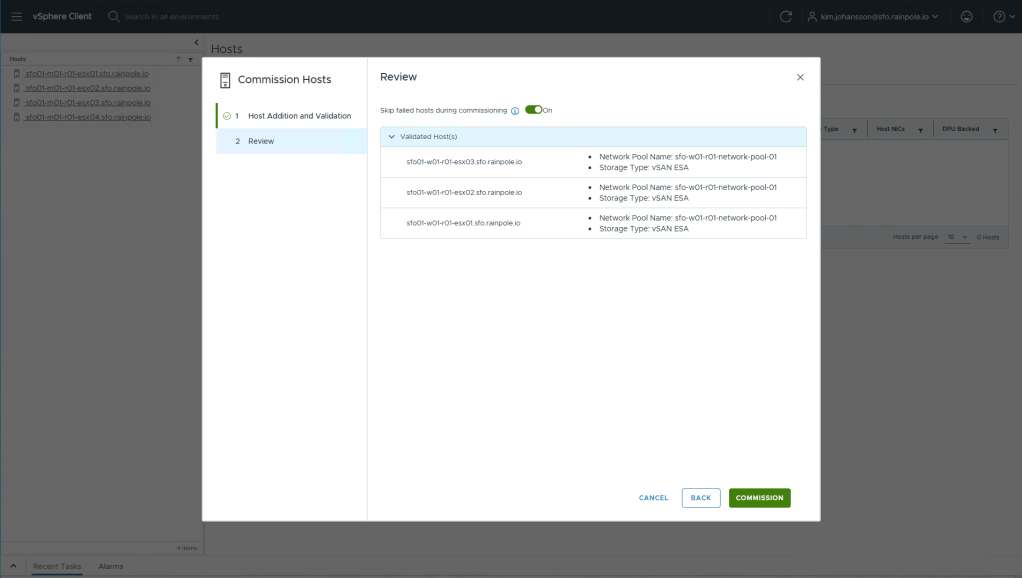
Review the information, and click Commission.
Depending on how many hosts you are commissioning, speed etc, this usually takes 20-30 minutes. You can monitor the progress in the Recent Tasks.
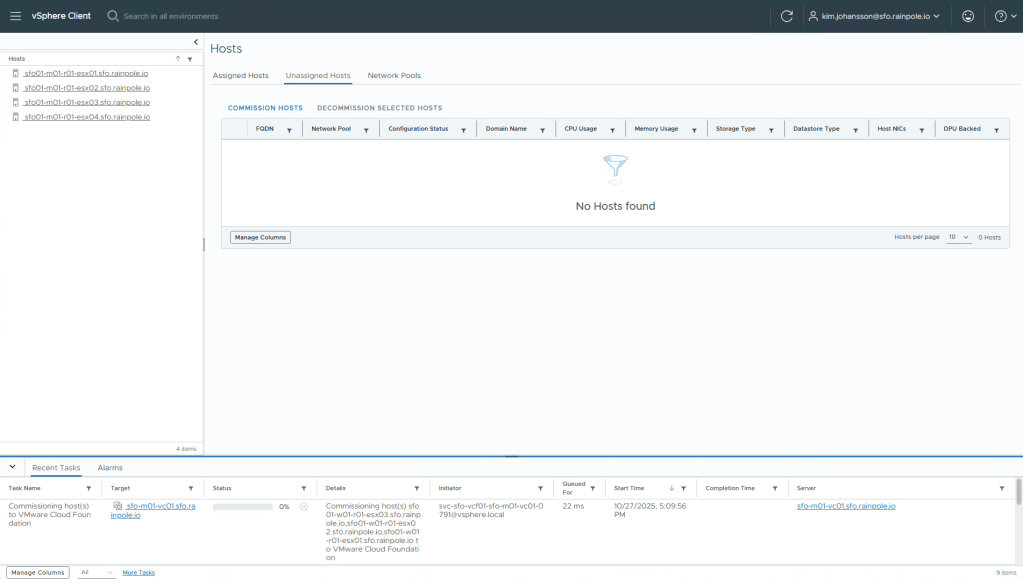
Once completed you will see the hosts populated into the Unassigned Hosts list.
Now, the process to add hosts to an existing Cluster, or create a New Workload Domain differ. If you wanted to add these hosts to an existing Cluster, or create a New Cluster you would do that from the vSphere Client.
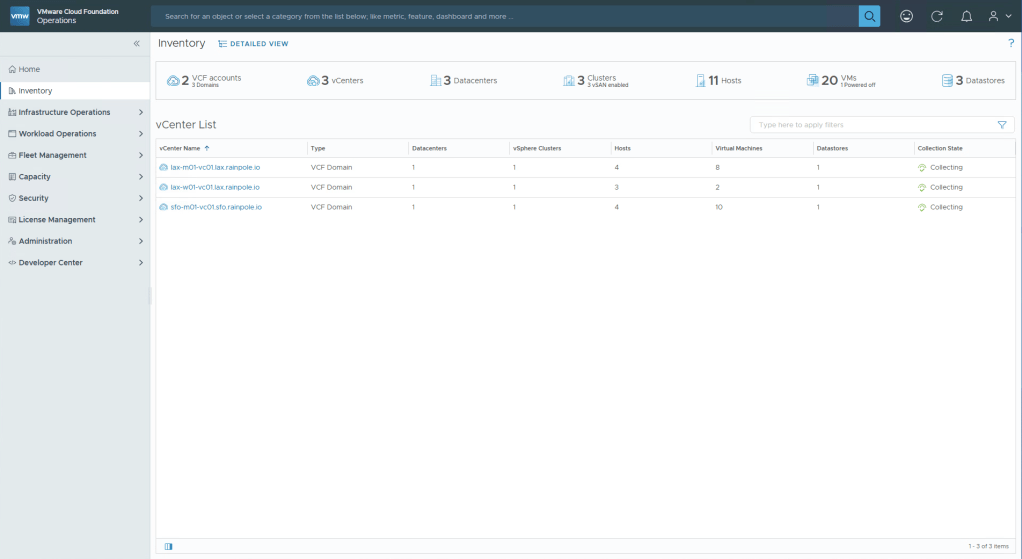
Since we’re going to create a new Workload Domain, we now need to go into VCF Operations.
In VCF Operations, select Inventory in the left menu, and then click Detailed View.
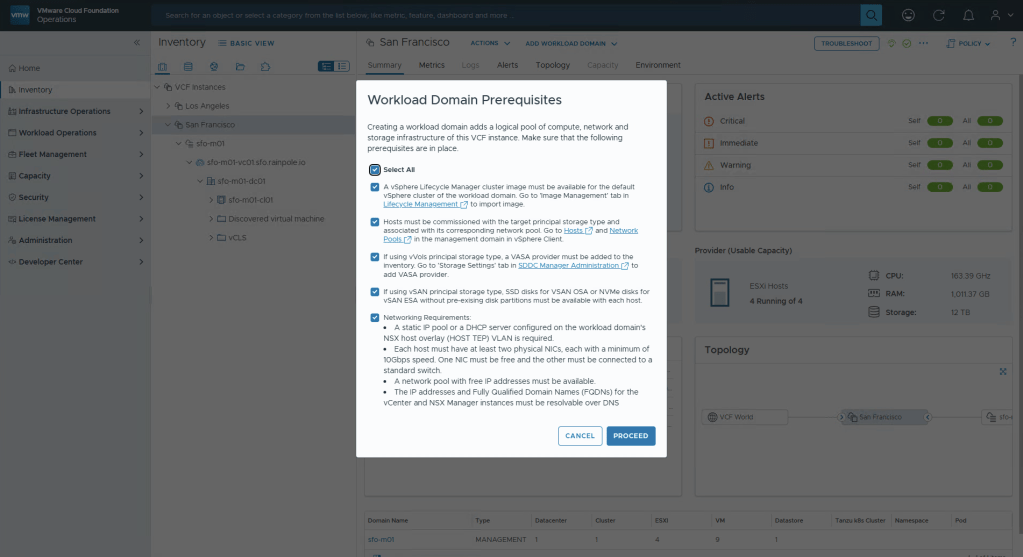
Now select the Instance you want to create a new Workload Domain in, in my case i will select San Francisco. Once selected, click the Add Workload Domain dropdown, and select Create New.

Read the pre-reqs, check the Select All box and then Proceed.
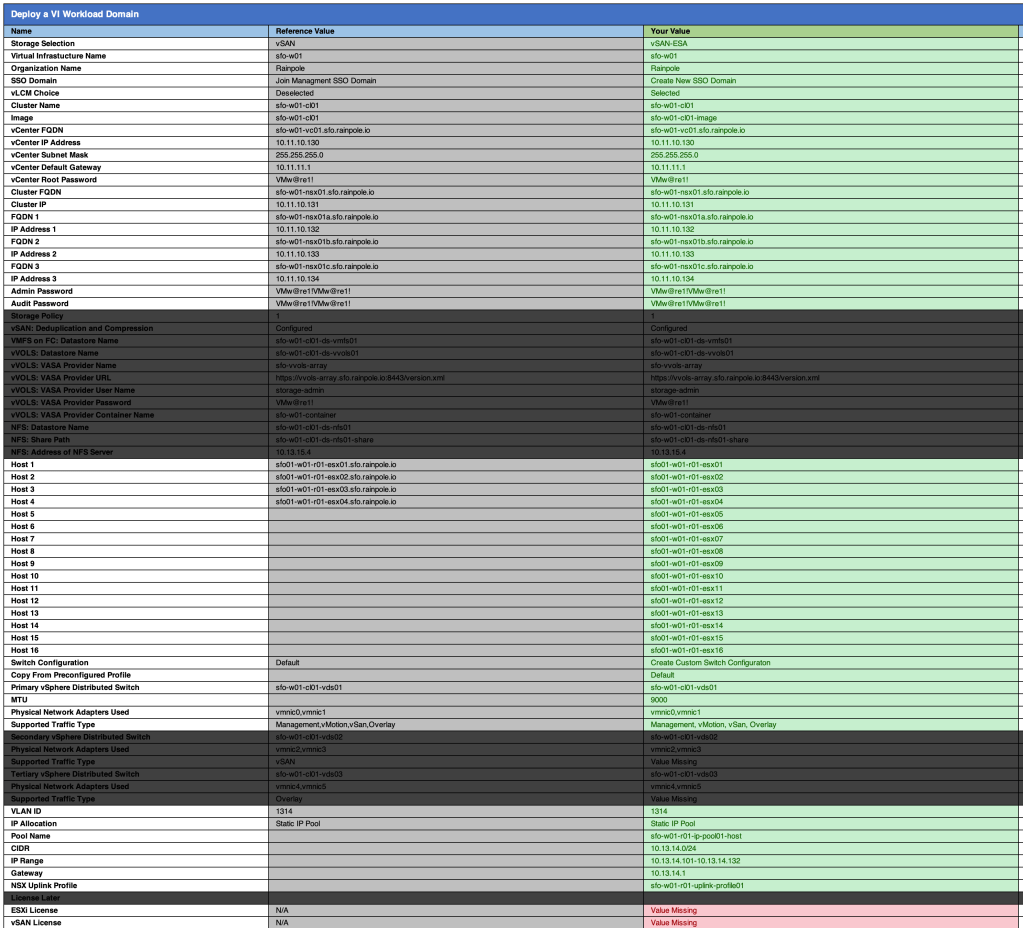
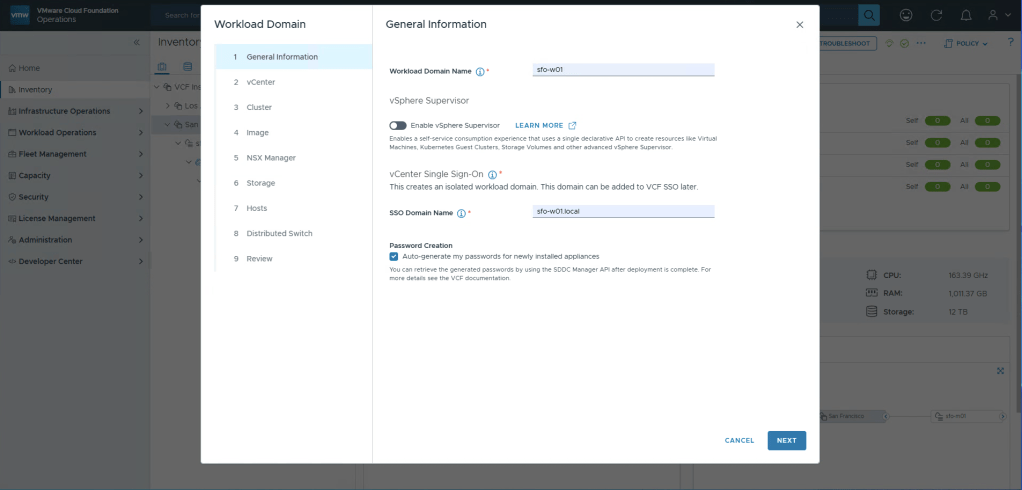
All the information required to fill in going forward can be found in the Planning and Preparation Workbook under the yellow tab VI Workload Domain.
Something new in VCF9 is that VMware has made it even simpler to get started with using the Supervisor. It’s simply a toggle switch, and a few inputs. I’m going to leave it deselected because the next blog post is going to be about how to setup the Supervisor over 3 availability zones, which is currently not possible in the UI. If you don’t have the requirement to setup the Supervisor over 3 zones, i recommend you leave this toggled on.
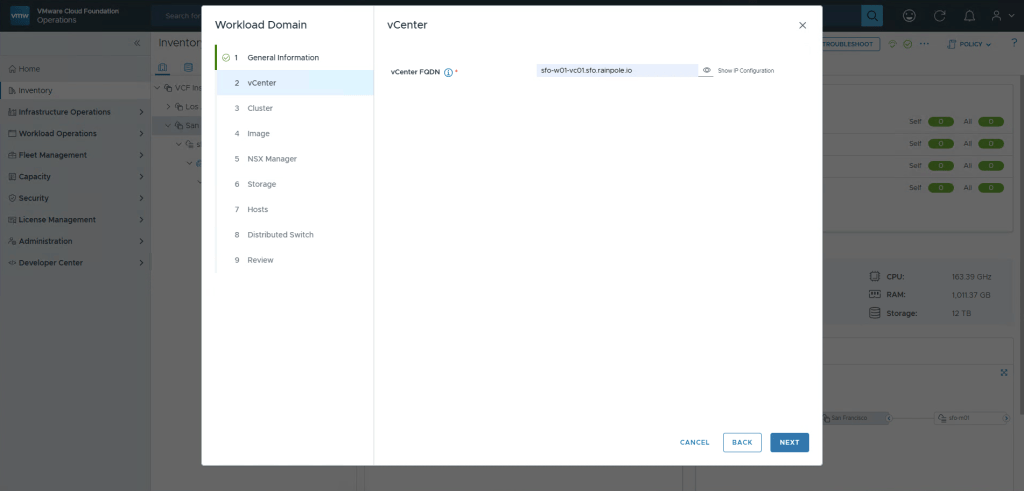
Simple enough, enter the FQDN for the vCenter for the new workload domain, no ip address input is required since this is found using reverse dns lookup.
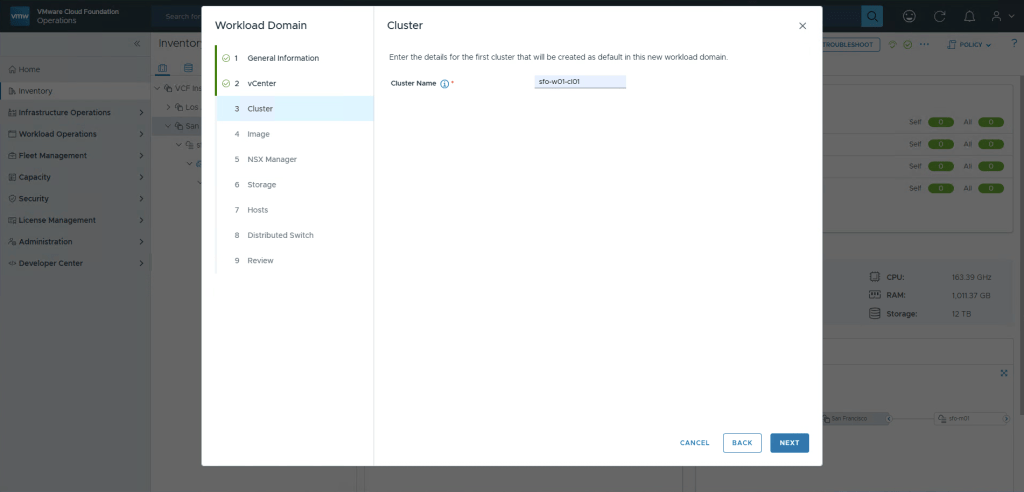
Enter the name of the cluster. Previously in VCF5 it was really important to be careful when selecting the name since some things where tricky to change in retrospect. Thankfully this is also a improvement in VCF9 where you can rename clusters in vSphere like normal, and it will dynamically reflect in the entire platform.
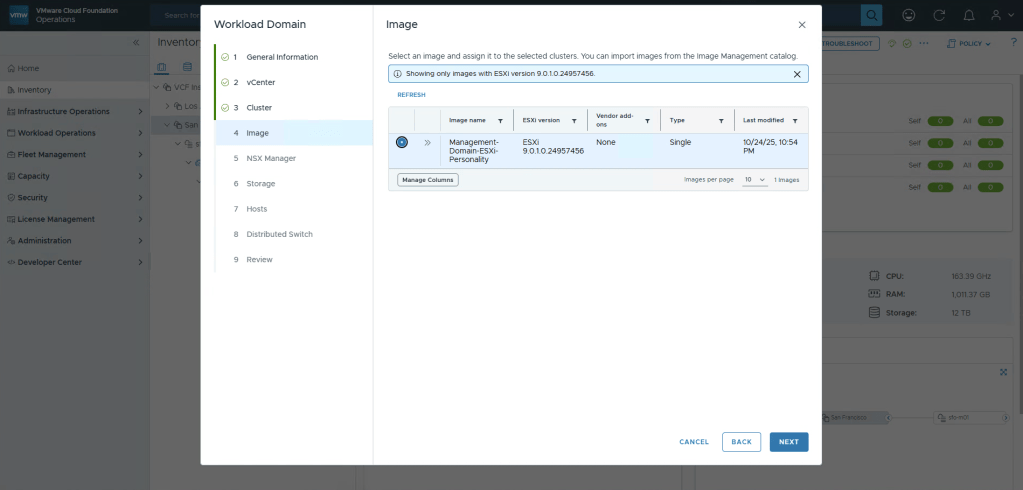
This is a nested environment, so it’s not really “hardware”, thus i’m opting to use the vLCM Image created when creating the Management Domain. If you are using the same hardware in both Management and Workload Domain there’s also no issue just re-using the Image already created.
Since this is just a lab, i’ve selected “Standard”, which should really be called “Low availability”. This will create a “singleton” or, a single appliance instead of clustered appliances. Since this is selected i only need to input one FQDN for the appliance, plus the VIP for the “cluster” (that only contains one node). Lastly, since i toggled the Supervisor to off i have the option to choose both Distributed Connectivity, and Centralized Connectivity. Currently in 9.0.1.0 the Distributed Connectivity is not supported when using the Supervisor due to lack of load balancing. Thus i’ve selected Centralized.

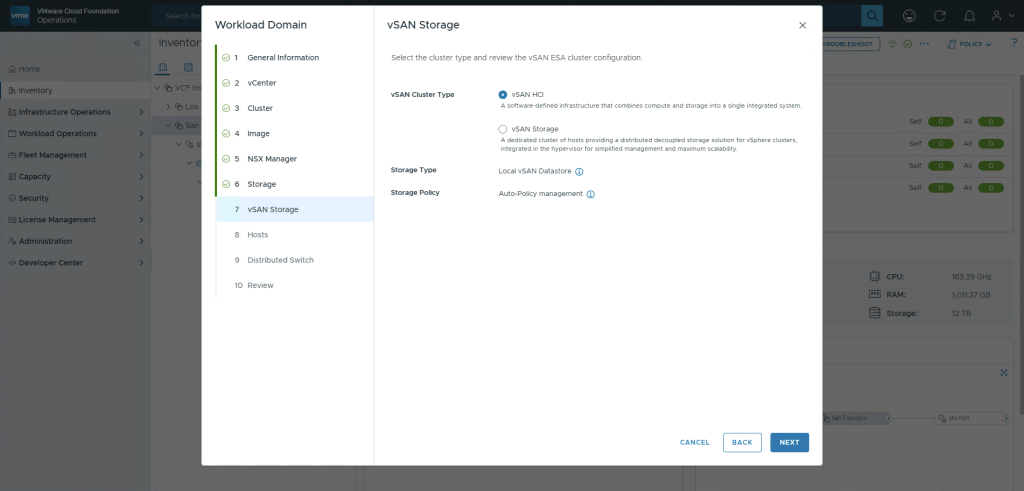
Next we’ll select the Principle Storage backing.

We now get the option to define if the cluster being created is a traditional HCI cluster, or a dedicated storage Cluster.
Now we need to select at least 3 hosts that where previously added to the inventory.

If you want to use DHCP for the TEP ( I don’t recommend this ) you acn select the default, otherwise select Create Custom Swith Configuration.
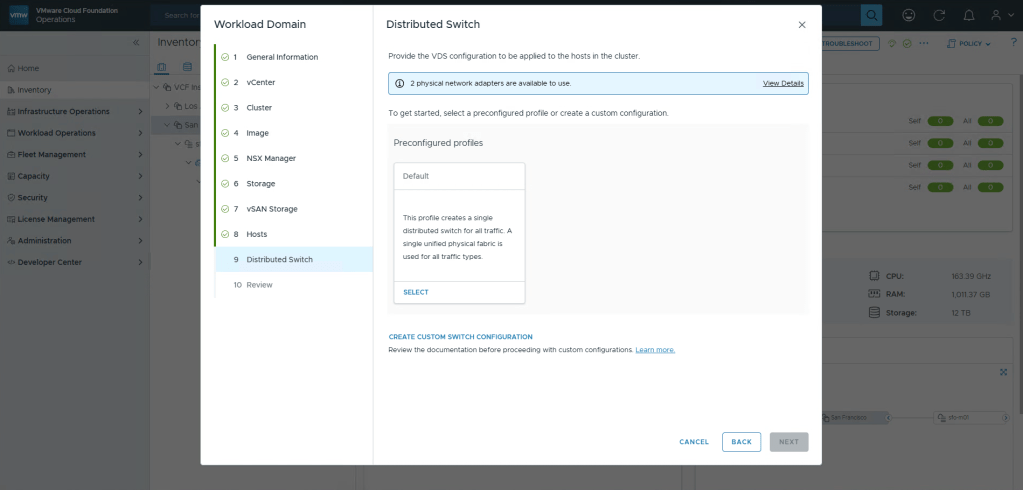
Instead of entering everything manually, since i only want to change to using static ips for TEP. Select the Copy from preconfigured Profile button, and select Default. Now 90% is done for us.

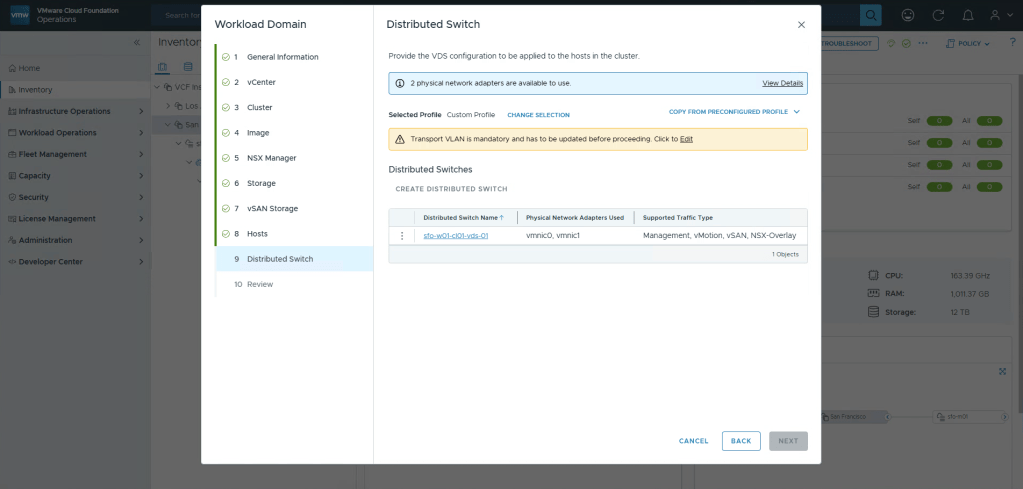
You’ll now get a yellow warning saying that we need to configure the transport network, click Edit.
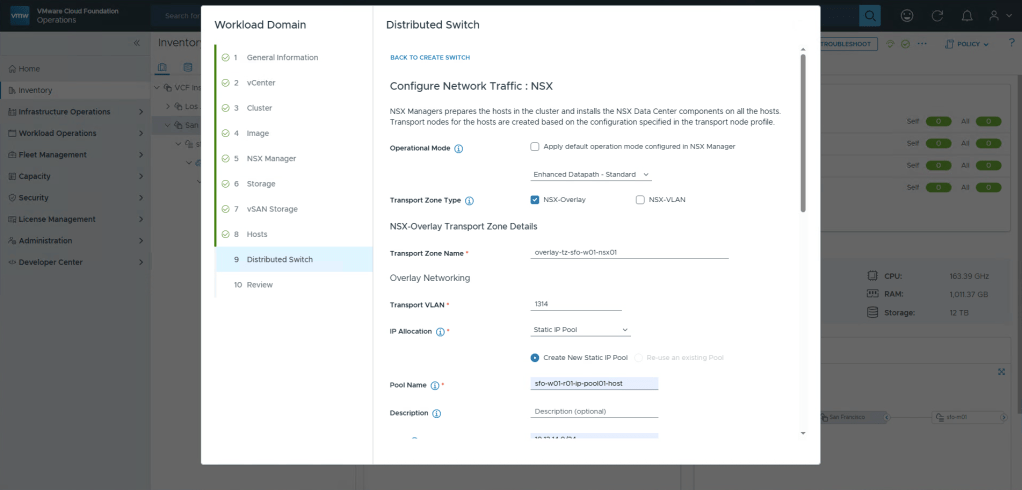
Scroll all the way down to the bottom to find the NSX inputs. Don’t bother entering anything yet, again select Edit. We will enter everythig here in one page.
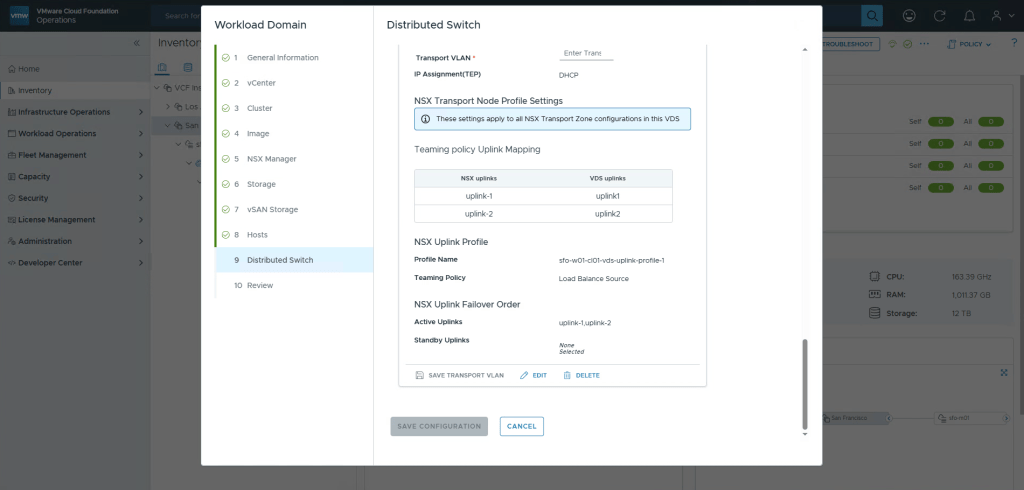
I change the Operational Mode to Enhanced Datapath Standard, this is actually the default in VCF9 and provides a lot more traffic throughput, highly recommended.
Now we just need to fill in all the details according to the Planning and Preparation document.
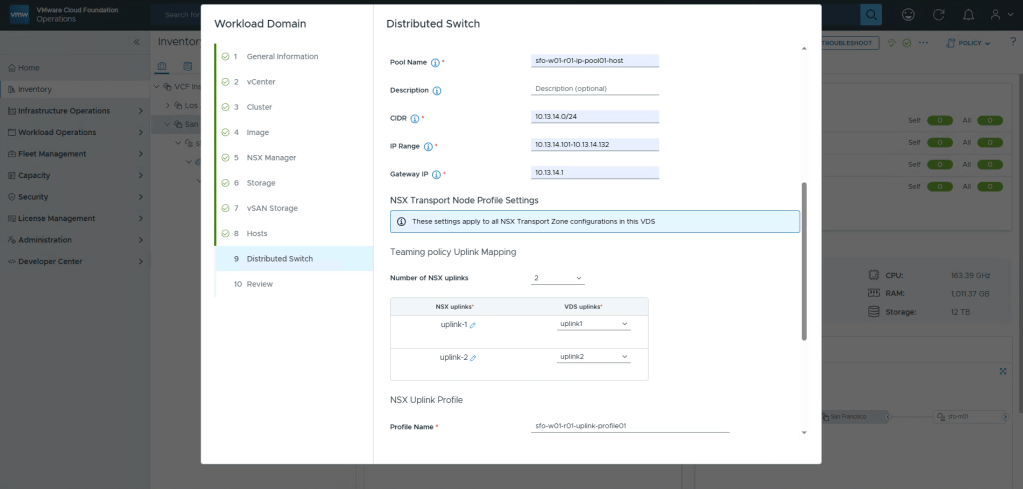
Once done, select Save Configuration.
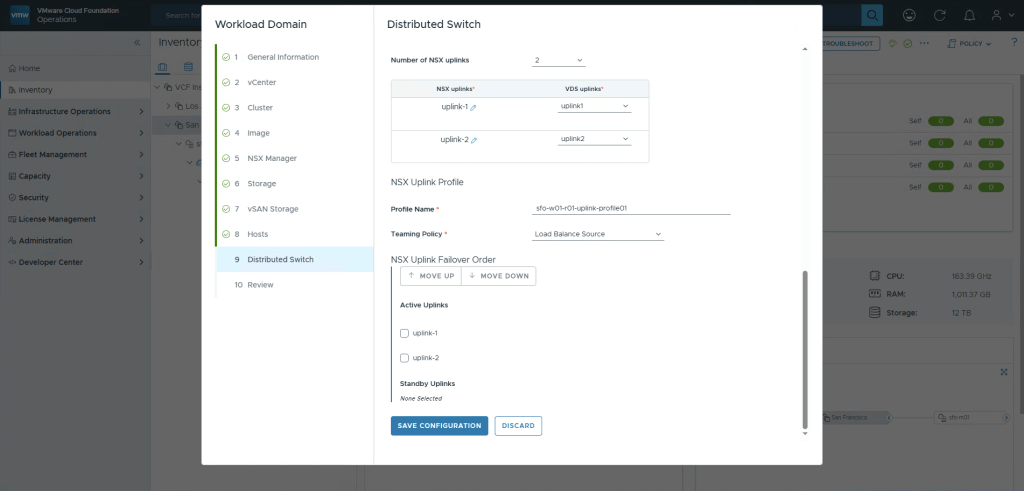
And then Save Configuration again to exit out of the edit wizard.

Acknowledge the message, we’ve configured this now, then click Next.

If you want to in the future automate this using JSON, you can select Json Preview to grab the JSON. You can then easily modify it to deploy more workload domains with similar settings.
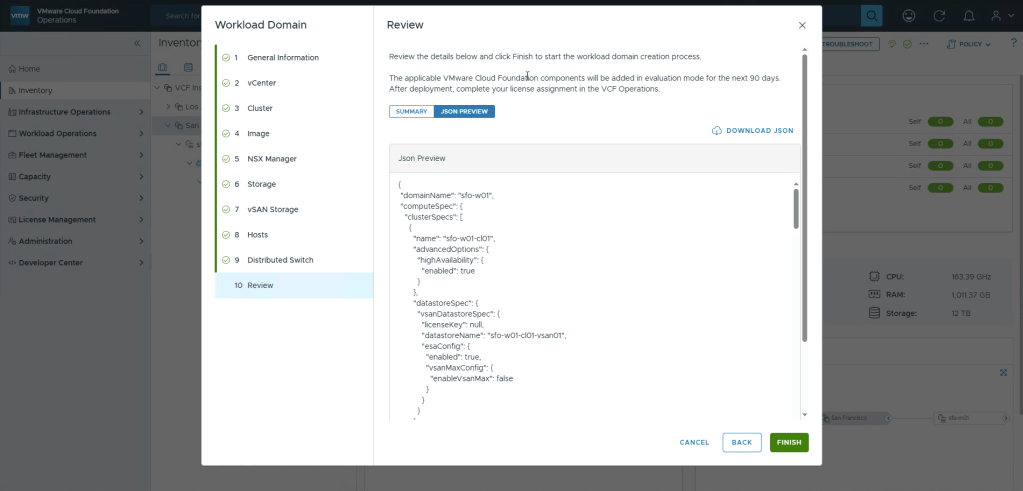
Read the Summary, and click Finish

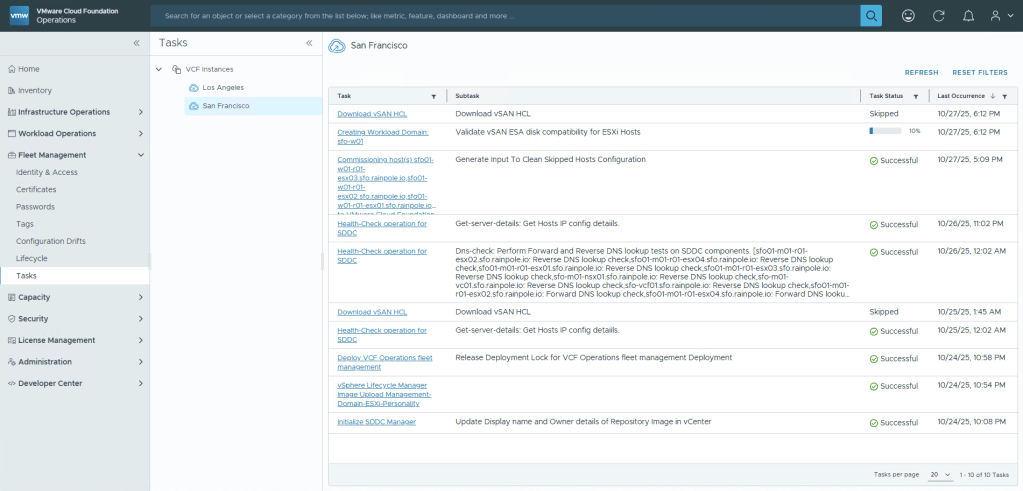
Expand Fleet Management, select Tasks, select the correct Instance, you should now monitor the creation of your workload domain. Since this is the first Workload Domain it takes a while longer since we’re also deploying a new NSX Instance. If you add a second workload domain and join an existing NSX Instance, the process takes much less time.
In a bit, your workload domain will be created, i highly recommend to revisit the vIDB configuration and push the configuration to your new vCenter and NSX, and apply permissions to each component to ensure you can login properly.
Also if you want to have your vCenters in one single browser tab, i recommend reading about vCenter Linking.

One thought on “VCF9 – Creating a workload domain”