Identity and Access Management
First off we need to ensure that we can actually login to the systems, right?
And also that we have a user, like a developer that can later consume these resources.
To tacle this, i’ve gone into my Active Directory using Active Directory Users and Computers and added two users.
I’ve given myself (Kim) Administrator roles for the following services.
This will allow me to Administrate the infrastructure for Compute, Storage, Network/Security, the lifecylce of VCF through the SDDC-Manager, and see the Administrator views for vIDM, Operations, and Automation. The groups referenced below are the examples provided in the Validated Solutions, and in the Planning and Preparation workbook for the deployment of Cloud Foundation.
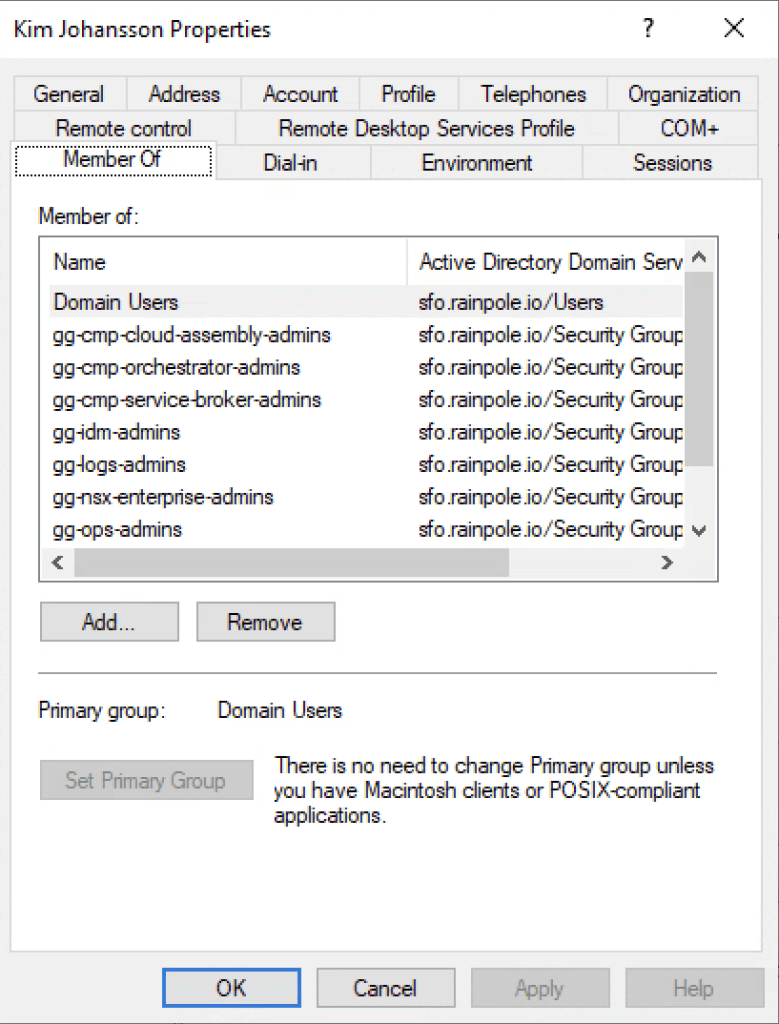
Groups:
gg-cmp-cloud-assembly-admins
gg-cmp-orchestrator-admins
gg-cmp-service-broker-admins
gg-idm-admins
gg-logs-admins
gg-nsx-enterprise-admins
gg-ops-admins
gg-vc-admins
gg-vcf-admins
gg-idm-admins
For Martin ( the developer ), i’ve given him the following properties.
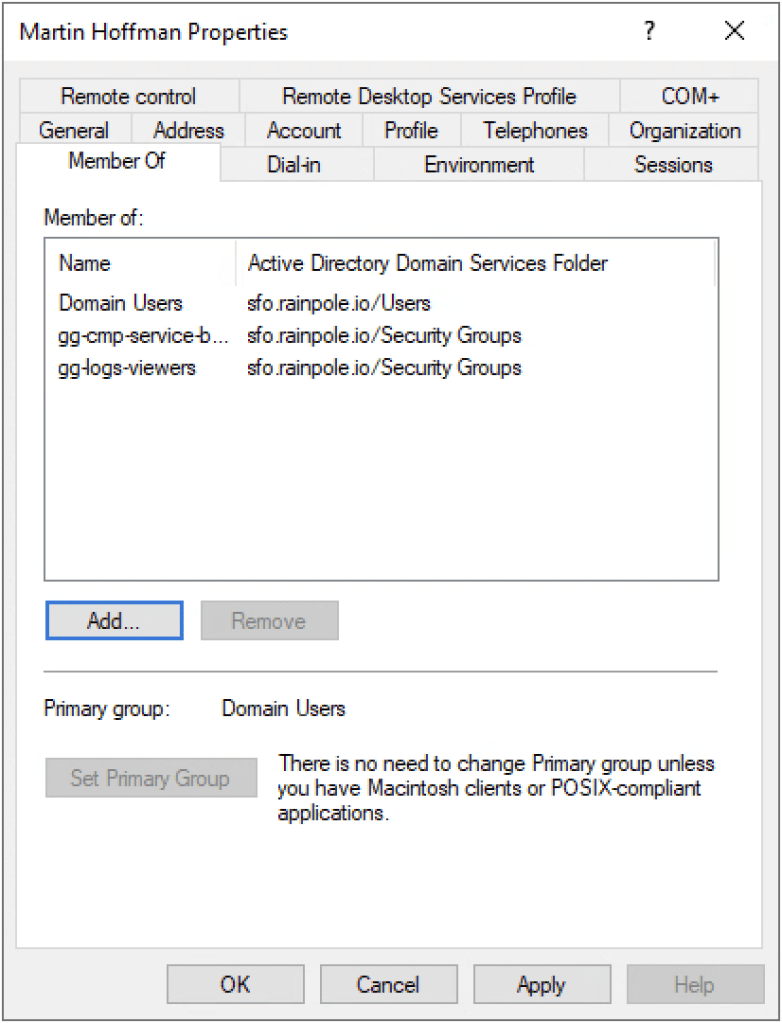
Groups
gg-cmp-service-broker-users
gg-logs-viewers
VCF Automation basics
Now that we’ve got permissions we can login.
You will be presented by 4 rather large icons, and some options.
For now all you need to know is this.
- Assembler – Is where an architect, or administrator will build consumable items. Don’t just think Virtual machines, or a group or Virtual machines, think VMs, Containers, Load Balancers, Microsegmentation policies, along with extensions such as AD Integration, Backup integration, and “Functions as a service” (Add remove users from ADs, reset password, expand disksize in VM).
- Orchestrator – Assembler and Orchestrator are like yin and yang. Assembler has lots of pre-existing integration with service such as vSphere, NSX, Azure, AWS, GCP etc. Orchestrator on the other hand has all the integration for more customizable things like Active Directory, Backup vendors, IPAMs, CMDBs, etc.
And if it doesn’t out of the box, or your vendor doesn’t provide a package, you can easily write your own integration. - Service Broker – This is the consumption interface where your end-users, or the end-users automation will consume the deliverables that you have built in Assembler. The whole point with VCF Automation is to allow users to either consume pre-determined workflows via the intuitive Self Service portal, or to simply execute a flow via their CI/CD or automation pipeline.
Lets paint the picture that you are tasked with creating a tile in the self-service catalogue for a self-service Linux virtual machine. You create a meeting and invite the Compute team, Storage team, Network team, Security team, and the linux team. (Create an empty blueprint).
You now go around the table, and each team will now expain their Requirements to allow a self-service linux machine to happen.
Compute team – Say that a VM can be deployed, but within reasonable parameters, such as no more than 6 vCPUs, and 12GB memory, with a 200GB disk. It’s also required to choose a patch schedule, and that the machine will be monitored by the Operations team monitoring software.
Storage team – Say that the VM can have up to 200GB disk without any approval, but a backup schedule of at least daily is required, but user is allowed to select a higher frequency. They’ll also permit the user to add an additional disk for Data.
Network team – Say that the VM is required to use a Static IP address obtained from the central IPAM, along with a DNS A and PTR record being created.
Security team – Say that centralized logging is required! A default microsegmentation policy will be required, but the user can also apply additional security policies to ensure hardening of the virtual machine. The VM must be joined to the Active Directory, and a AD group for users permitted to login, and an AD group for SUDO users must be specified.
Linux team – Say that they ask that the base-image is as slim as possible. The essentials for the corporate image should be implemented, but any customization should follow by further automation by Ansible or Salt. The two preferred paas automation frameworks.
You’ve now gone around the table gathering requirements, and options, and this is precisely what can now be entered into a blueprint in Assembler, which when published, can be consumed by an end-user.
The End-user will be delighted to be able to recieve such a VM within seconds, and the Architecs and Operations team are delighted that the user now has no other option than being compliant to their requirements.
Portal customisation
Before we dive into Assembler, I think it’s a good idea to customize the portal a bit. First impressions last, and when you invite your colleagues to the new self-service portal it’s nice that it looks modern and fresh.
Select the Branding menu on the left hand side.
Change the Product Name to something that represents your organisation.
Upload a transparent .png with your organisation logo by pressing Browse
Click Apply
Under the Identity and Access Management menu on the left hand side, just toggle between the Active Users and Enterprise Groups to see the first things that the Validated Solution has already done for you.
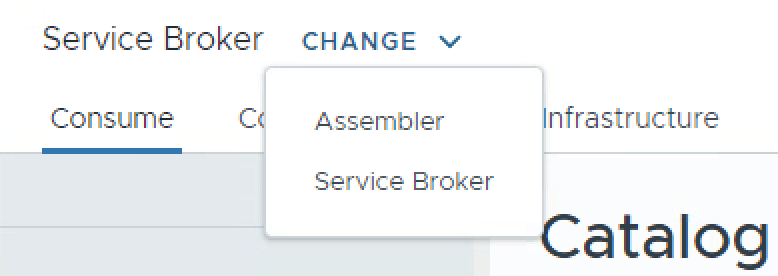
Service Broker
Select the top left option Services again, to display the main options again, and select Service Broker. This will bring you to the Catalog. It’s empty right? Let’s change that.
Either click the 9 squares in a grid in the top right corner, and select Assembler. Or to quicker switch between Assembler and Service broker, select the Change dropdown under your organisation name, to jump between them.
Assembler
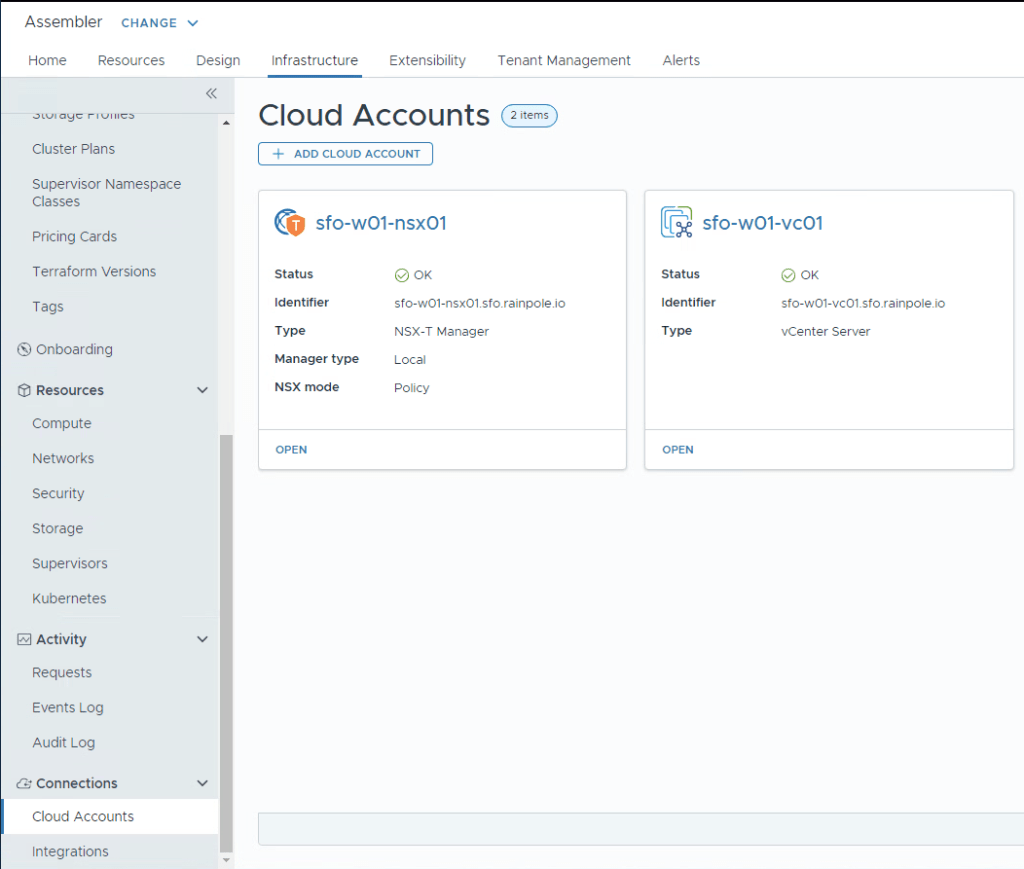
Let’s have a look around at what the Validated Solution has already configured, so we know what we’ll then need to fine tune.
Click the Infrastructure tab. We can see here that both the vCenter and NSX manager have already been added using the service accounts provided in the Planning and Preparation workbook. Both the vCenter and NSX manager have also been associated with each other so they work in tandem.
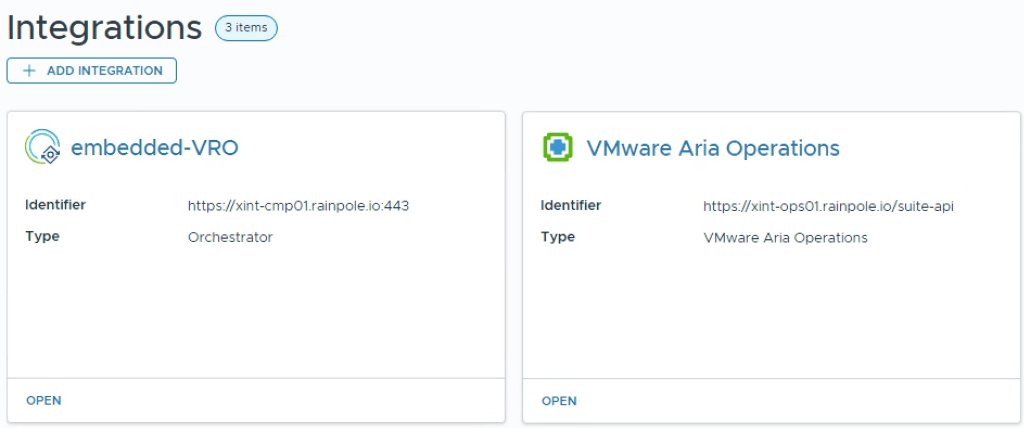
Click the Integrations tab, Here we can see that both the embedded vRealize Orchestrator, and VCF Operations have been integrated.
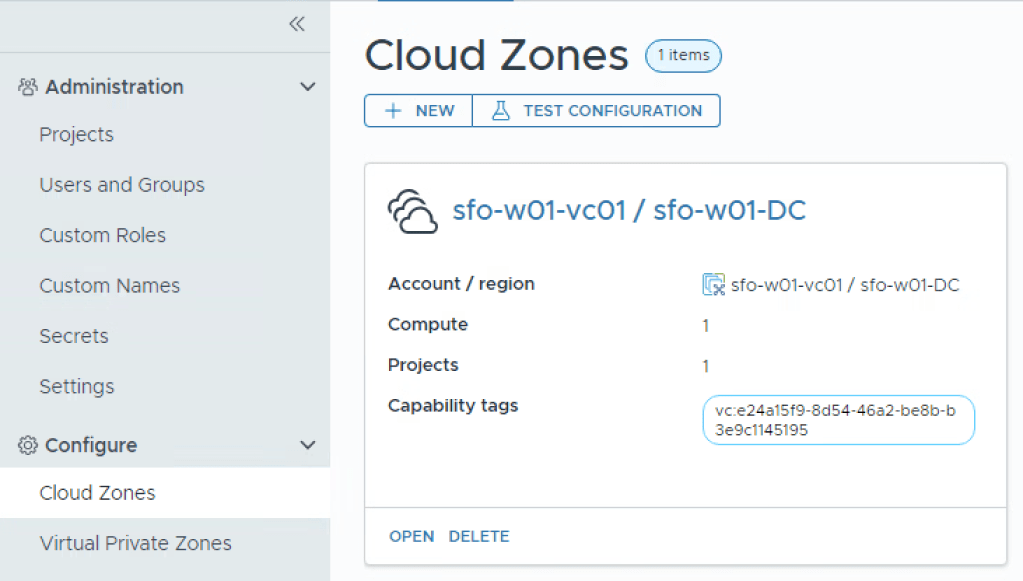
Head up to the Configuration section, and select Cloud Zones for the last vital thing to see that’s already been configured. Here we can see that the Workload Domain has already been configured, ready to have things provisioned to it.
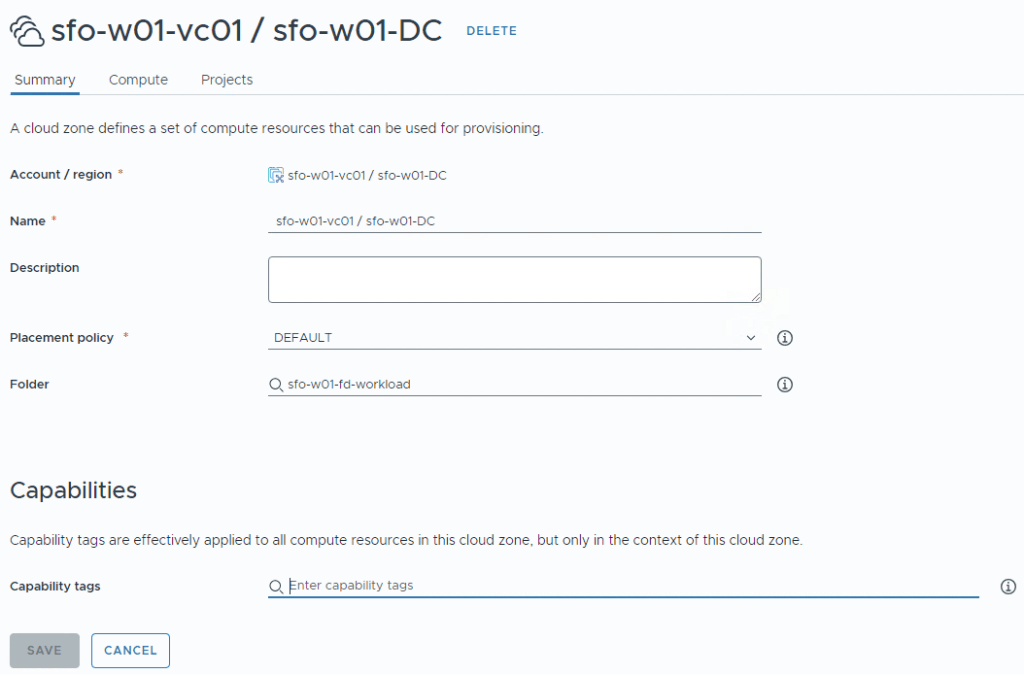
Click Open to check the things configured, here we can see that a folder has been assigned to where VCF Automation should deploy to.
Click Compute tab for one last thing. Here we can see that it’s also assigned the two resource pools (one in each cluster) to provision to.

Wrap up
So now we’ve inspected what’s already been done for us, now we need to do the custom stuff!

One thought on “Part 2 – VCF Automation – What’s already done?”